This
page outlines use of common hand tools located in the toolbox at each lab
workstation.
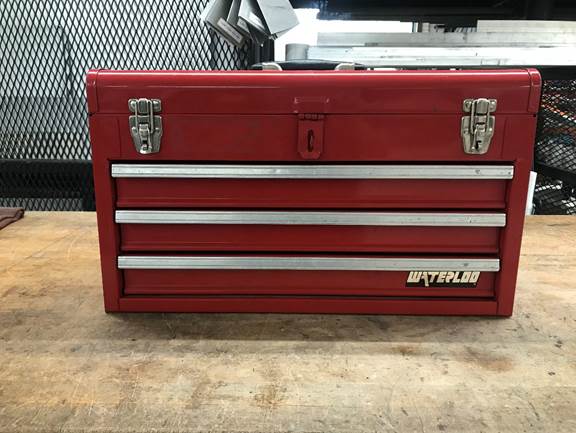
Each
workstation toolbox contains the following items:
Upper Compartment
1. 90° carpenter square
2. 90° speed square
3. 10′ tape measures
4. Sharpie permanent markers
5. scissors
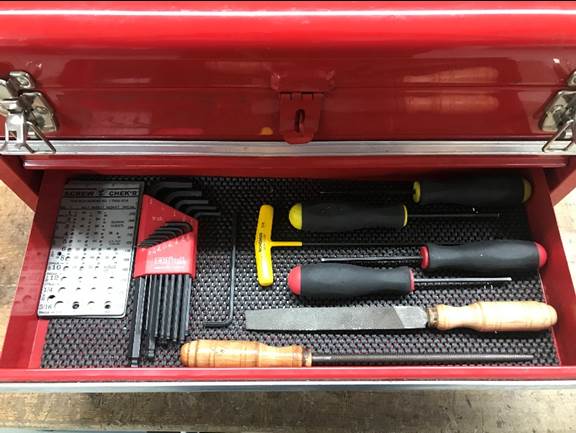
Top Drawer
1. pliers
2. screwdrivers (2 phillips,
2 slotted)
Middle Drawer
1. ball-end Allen wrench set
2. ball-end 5/32” Allen wrench
3. ball-end Allen drivers
4. flat-end Allen drivers
5. tee-handle Allen driver
6. hand files
7. metric / standard fastener gauge
Bottom Drawer
1. metric / standard wrench set
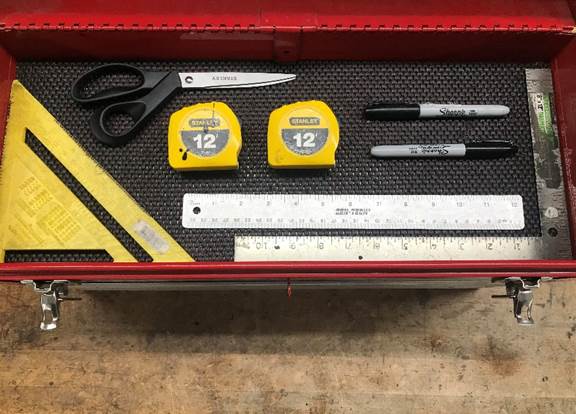
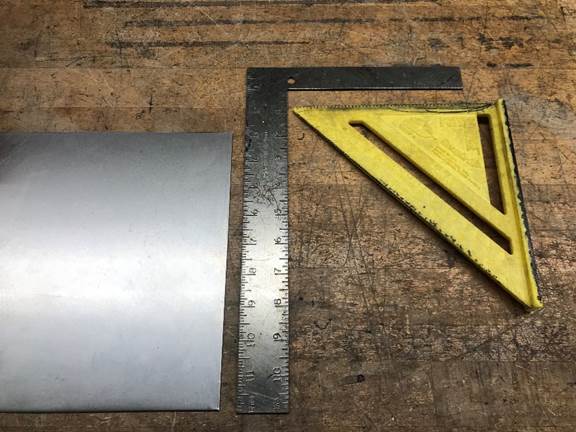
The
top portion of each toolbox contains measurement and layout tools, including
Sharpie® markers, tape measures, a ruler, a speed square, a
carpenter’s square, and a pair of scissors.
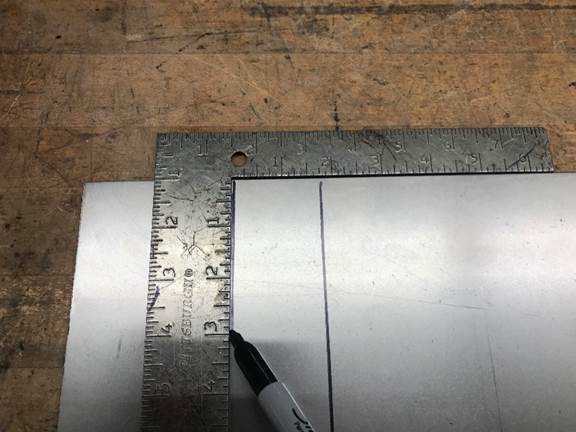
Each
tape measure has units in inches, where each tick mark denotes 1/16″
The
speed square and carpenter’s square are commonly used
for sheet metal layout. Both tools can
be used for creating right angles.
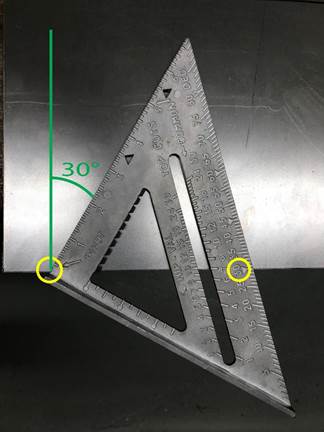
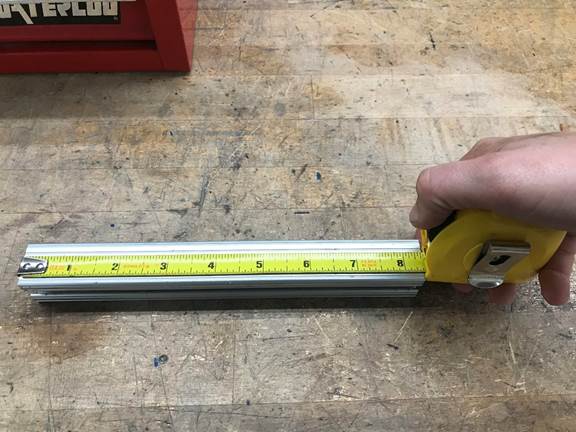
The
speed square can be
used to mark an array of common angles by pivoting the square around the 90°
corner and lining up the edge of the work piece with the desired angle noted on
the hypotenuse as shown in the example for a 30° angle.
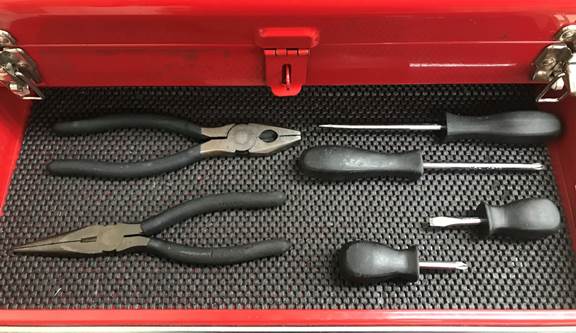
The top drawer of the toolbox contains
short and medium length Phillips-head and flat-blade screwdrivers, needle nose
pliers, and linesman pliers.
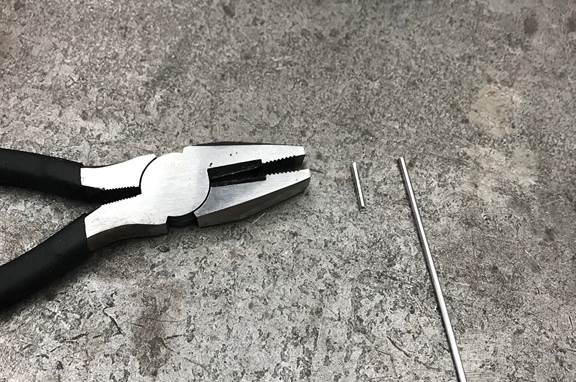
Linesman pliers can be used for
cutting and bending thin rod or wire. Never cut motor wires without express
permission from a TA, and never cut wires which are connected to a power
source.
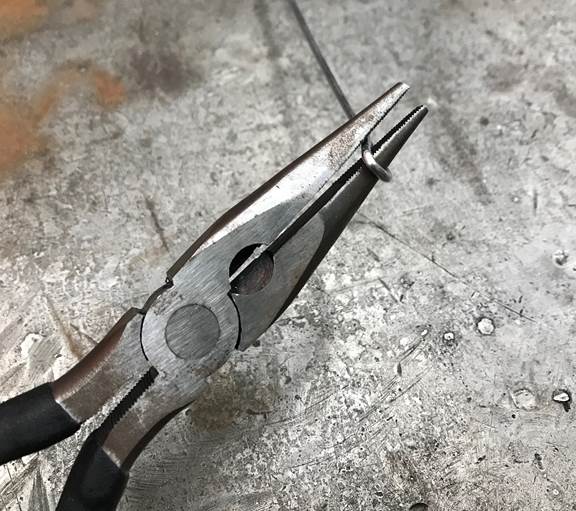
Needle nose pliers can be used for
bending thin rod or wire, or for holding onto small parts. Never
bend motor wires, as this can cause them to break over time and they cannot be
replaced.
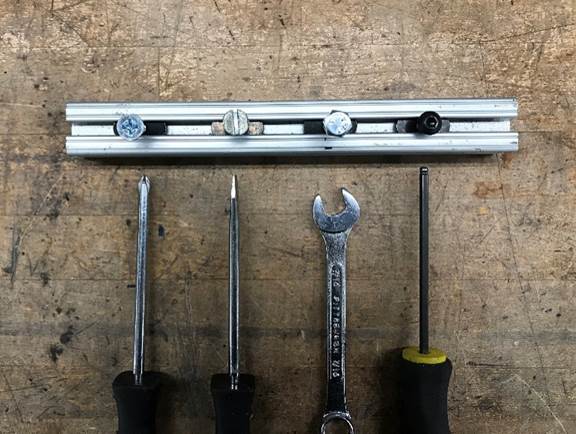
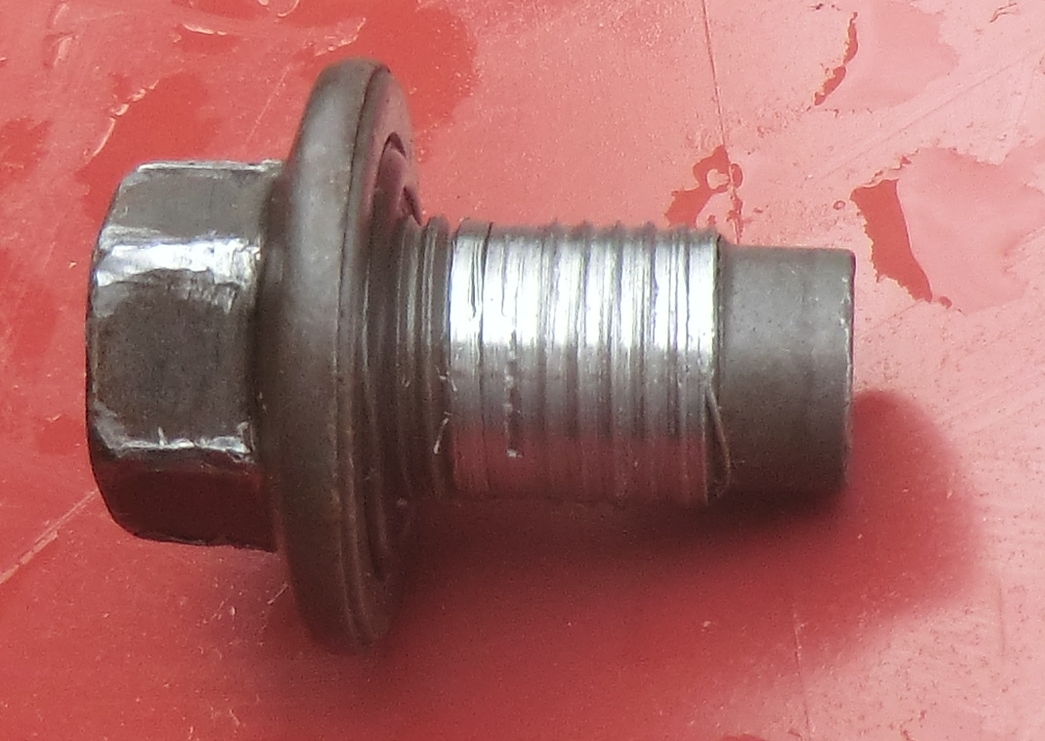
Common
fastener head types used in the lab are (from left to right) Phillips-head,
flat-head, external hex, and internal hex.
Allen wrenches and combination wrenches for the latter two head types
can be found in the second and third toolbox drawers respectively.
The
second drawer of the toolbox contains two yellow handled, ball ended 5/32″
hex wrenches; two red handled, square ended 5/32″
hex wrenches; a set of standard hex wrenches in 1/32″
increments; a yellow tee-handled Allen wrench; a standard and metric thread
checker; and two files.
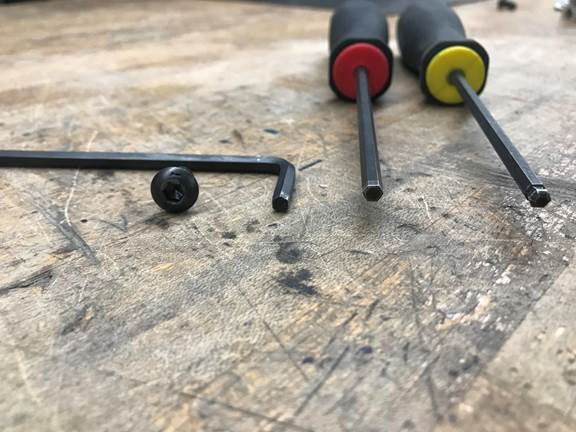
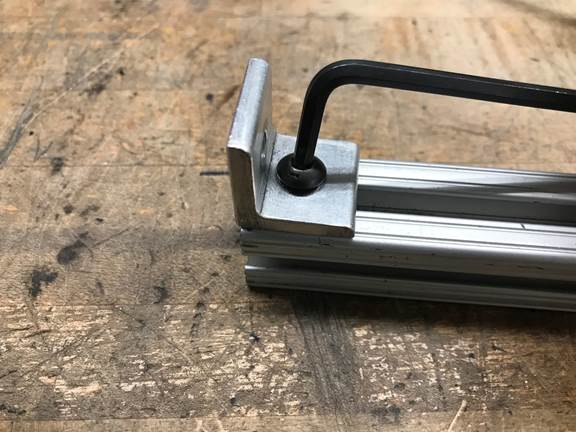
Each
toolbox contains three types of the 5/32″ hex
wrenches most commonly used on the ¼-20 button head cap screws used to attach
80-20 components.
The
yellow 3/32″ tee-handled Allen wrench is the
appropriate size for the 10-24 set screws commonly used on robot wheel hubs.
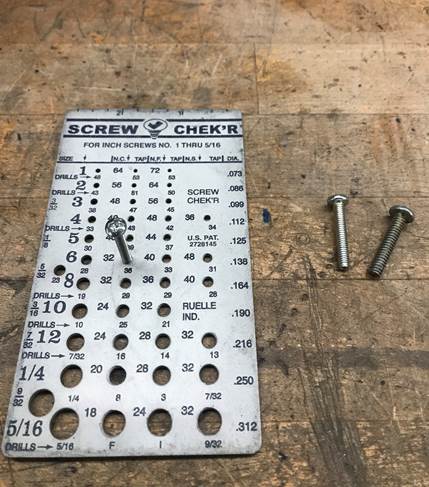
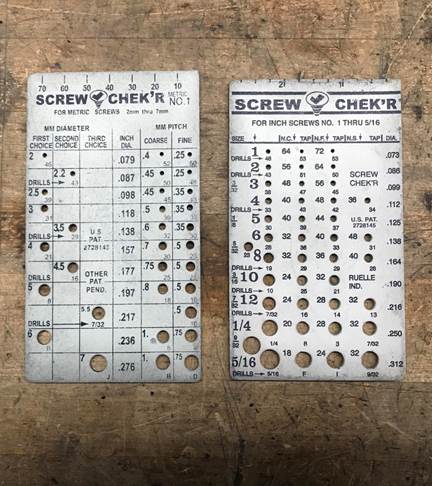
Fastener
gages can be used to determine the thread pitch of standard and metric machine
screws. Gently thread the fastener into
the gauge. The fastener should thread
easily into the properly sized hole by hand.
If additional force is required, the wrong gage location is likely being
used, and a different pitch should be checked.
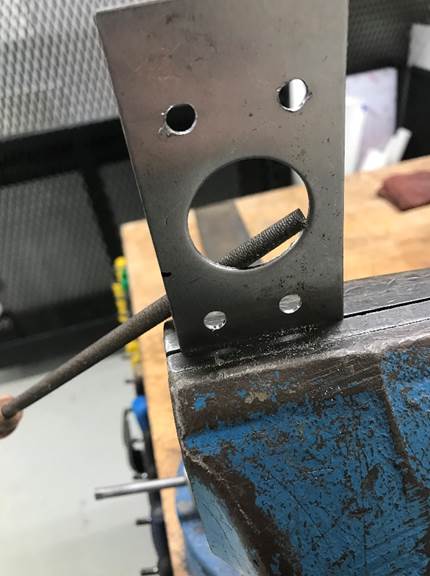
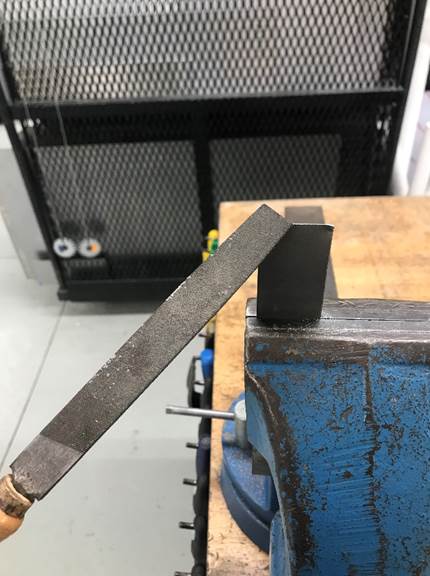
The
circular file can be used for deburring holes and internal features, while the
flat file is better suited for flat or external features. The file should be held at a 45° angle to the
part, and run from tip to handle across the length of the edge. Do not use the file in the reverse direction,
as doing so will damage the file.
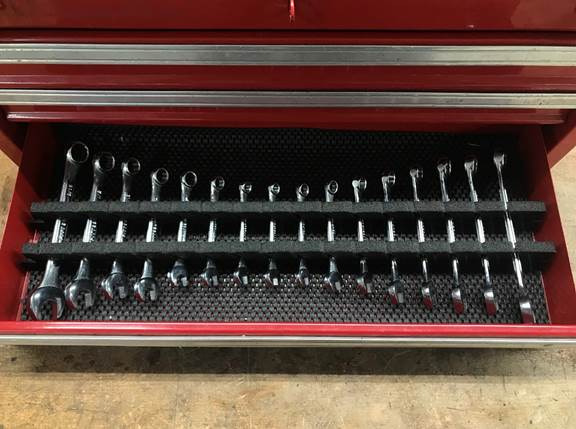
The
third drawer of the toolbox contains a set of metric and SAE combination
wrenches.
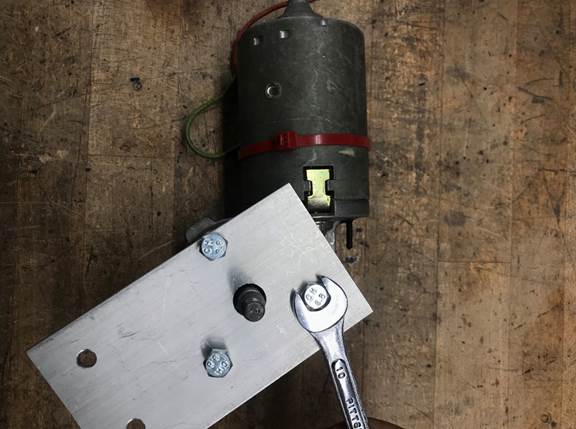
A
combination wrench or a socket wrench should be used anytime a hex head
fastener or nut needs to be tightened.
The appropriately sized wrench will slide over the hex easily, but will
not have more than 5° of wasted motion.
Using a wrench which is too large will result in damage to both the
fastener and the tool.
IMPORTANT NOTE ABOUT
FASTENERS: When
installing fasteners, always stop and make sure the fastener
threads together all the way in by hand before using a wrench to tighten it. If the fastener threads are the correct match
and in good condition, a tool should never be needed to thread the fastener
together, only to tighten it. In
addition, always make sure each fastener has at least 5 threads of engagement
before tightening, or the threads will be destroyed when the fastener is
tightened.