LAB MAINTENANCE
Quick Links (Table of Contents)
Introduction [RETURN TO T.O.C.]
This document illustrates how to perform common lab maintenance tasks outline on the Laboratory Maintenance Checklist.
General [RETURN TO T.O.C.]
Clean safety glasses.
1. Use paper towels from the bathroom and the glass cleaner in the spray bottle on the apron rack to clean the lenses.
2. Discard glasses with scratches that make forward vision uncomfortable.
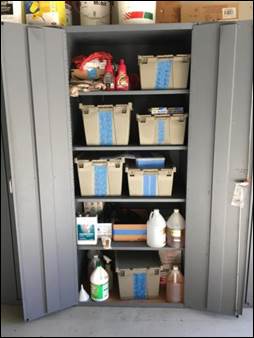
3. If there are not 30 pairs of glasses on the rack, try to find the missing glasses elsewhere in our lab, SAE’s safety glass rack, Aaron’s lab, and the student shop, and then retrieve additional pairs from the safety cabinet by the garage door. Place 20 pairs of glasses on the top portion of the rack and hang the rest on the apron hooks.
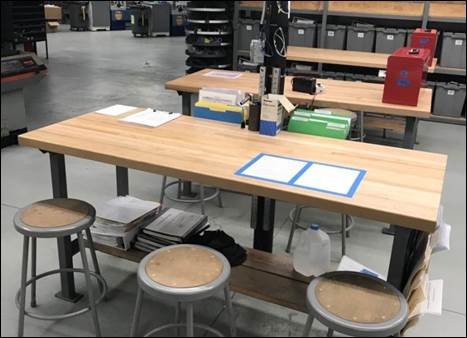
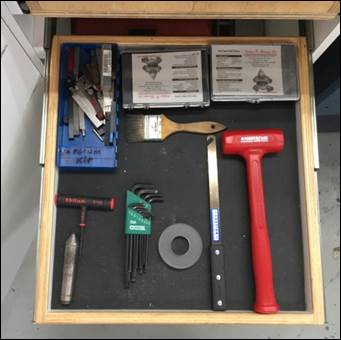
Organize mill tables.
1. Wipe off and organize the laminated handouts in the wire baskets.
2. Blow out parallel boxes, caliper boxes, drill box, shadow box, and blow off table.
3. Organize shadow box; inspect endmills for large chips or built up edge (if unsure, perform a test cut with the tool and check surface finish).

4. Replace any damaged or missing drills if they can’t be found on the mill table. Refills are in left-most mill cabinet.
5. Give damaged tools to Mike so he can replace them.
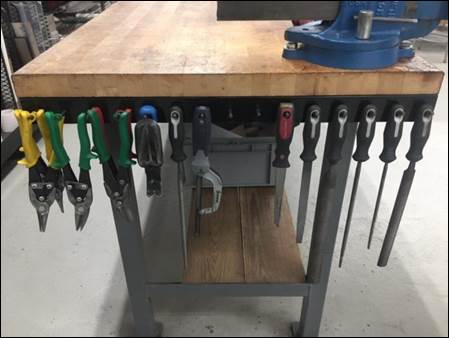
6. Organize deburring tool racks.
7. Shake off rags in trash can, fold and organize; discard and replace any filthy rags with replacements located in the safety cabinet.
8. Place hammer on top of piece of sacrificial wood/MDF.

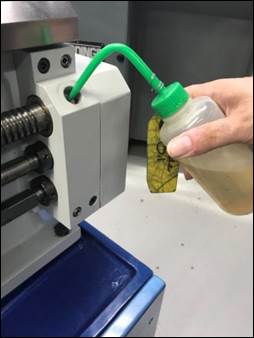
9. Wipe off and refill oil bottes; there should also be one bottle with WD-40 for machining plastics or finishing cuts on aluminum.
10. Put anything that doesn’t belong on the table in a box and place it outside Mike's office for organization or discarding.

Check calipers, sharpies, rules
1. Blow out caliper boxes and rack & pinion gears.
2. Check caliper function by ensuring they return to zero within +/- 0.002".
3. Check Sharpies are present and working.
4. Verify 6" x 3/4" steel rule with magnetic backing is present.
5. If Sharpies or rules are not present, search the lab and SAE side (DML Sharpies always have a colored dot on the end opposite the cap), and if you can't find them, retrieve a replacement Sharpie from the shelf by my desk and a replacement rule in the metrology cabinet.
Consolidate and empty trash
1. Consolidate trash bags so they are about 3/4 full, twist tie and place the bags outside the garage door in the concrete planter for pickup and disposal.
2. Place new trash bags in cans, tying the top so they don't fall inside the cans when used; replacement bags are in the safety and cleaning supplies cabinet.
Highlight absences in roster
1. Review the previous week's roster and mark anyone highlighted as late and never signed in as absent by highlighting their entire signature block for that week.
2. If students signed in the wrong date/block, write the correct date clearly next to their wrongly located signature and initial their proper signature block.
Inspect / refill drill indexes
1. Blow out lathe, mill, and drill press drill indexes
2. Inspect condition of the drills, especially commonly used sizes like 1/8", 1/4", #21; small chips are okay, we are looking for major damage.
3. Replace missing (after searching the area) and damaged drill bits so the mill and lathe drill sets are complete; the index by the drill press is more tolerant of damaged drills, so refill it with any questionable drills from the other two sets and put the new drill(s) in the lathe or mill drill indexes.
Mop floor
SAE usually takes care of this on Sundays, so inspect the floor and sweep and mop any areas of lab which are not clean; pay particular attention to the areas around the Marvel, lathes, mills, CNCs and the rear room by the food preparation station.
Refill oil / Simple Green bottles
1. Simple Green bottle locations: VF-2 table by entrance door (1), mill tables (4), lathe cabinets (4), drill press area (1), on top of SL-10 (1)
2. If bottles are missing, check the rest of the lab, including the SAE space.
3. Each bottle should be filled with approximately 80% water and 20% Simple Green.
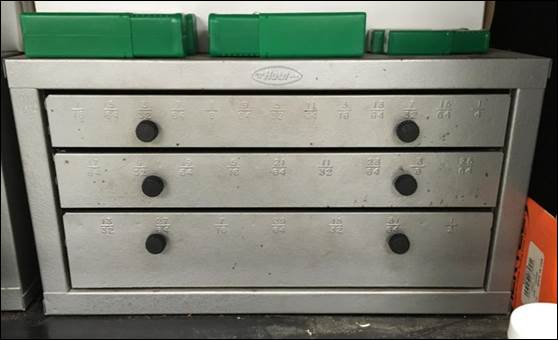
Inventory drills in storage bins
1. The drill bit storage bins (for fractional, lettered, numbered, and metric drills) are located in the left steel storage cabinet behind the milling machines.
2. We should stock the following quantities based on drill size: 1/4" or smaller (12); between 1/4" and 1/2" (6).
3. Don’t worry about counting the exact quantity of each drill size, but identify any sizes that clearly appear to be low on quantity and write them down on a piece of paper for Mike.
Milling Machines [RETURN TO T.O.C.]
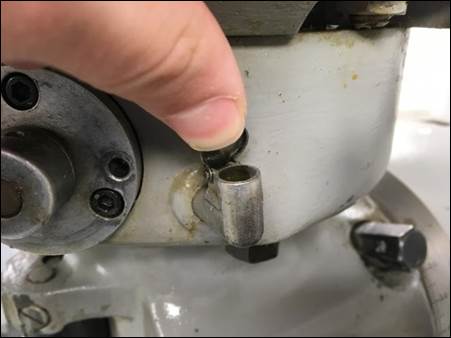
Clean, oil, and organize collets & drill chucks
1. Obtain a long Q-tip from the second set of cabinets in the main lab or in the first set of cabinets in the student shop.
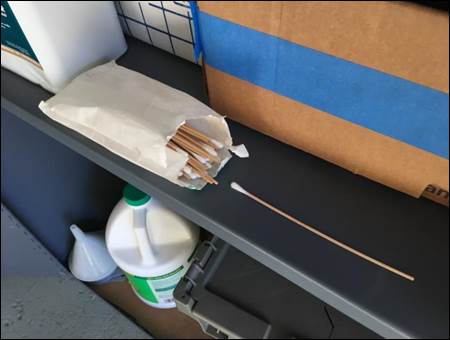
2. Blow out any debris or chips collected in the collets sitting in the collet rack using the air gun.
3. Apply spindle oil to the cotton tip of the Q-tip and swirl the cotton tip around the threaded portion of each collet and the drill chucks.
4. Re-apply oil to the cotton swab as needed when oiling each collet in the racket.
5. An oily rag may be used to wipe off the cotton tip if it becomes excessively dirty.
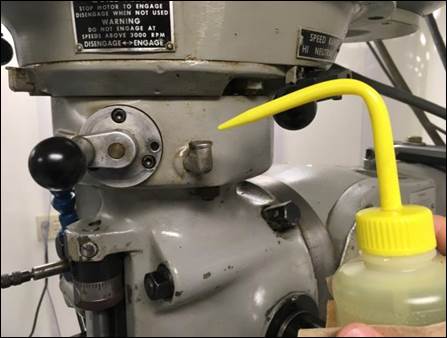
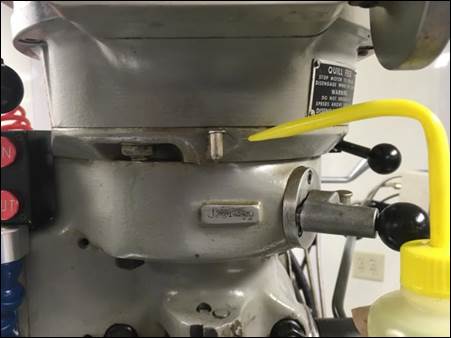
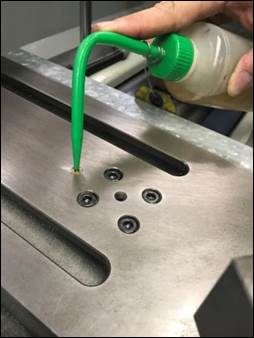
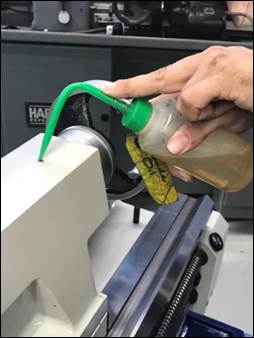
Oil spindles
1. Oil the spindle using the spindle oil bottle marked with a yellow top.
2. Locate the two spring loaded oil cups located on the front of the milling machine head and the right side of the head near the speed selection lever.
3. With the spindle running in high range, lift the spring-loaded cap to each oil cup and fill to the top with the spindle oil.
4. Wipe away any excess overflow with a shop rag.
5. Keep machine running for 5 minutes, then turn-off.
Oil ways
1. Obtain nitrile gloves from the second set of cabinets near the garage door in the main lab or the first set of cabinets in the student shop.
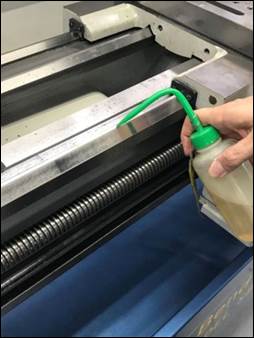
2. Collect the (guide)way oil bottles marked with green lid.
3. Select a used red shop rag from the red oily rag container.
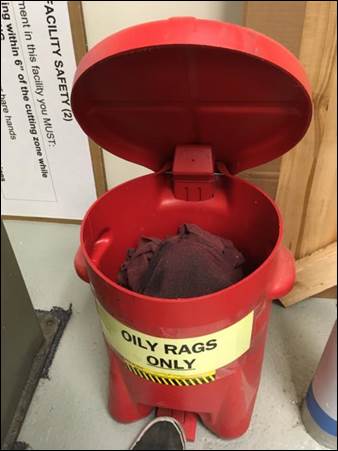
Oily rags bin located by the chemical cabinet in the lab and behind the Do-All in the student shop
4. Move the X- and Y-axes of the milling machine to one end of their travels.
5. Lower the knee sufficiently to access the upper-most side of the Z-axis ways.
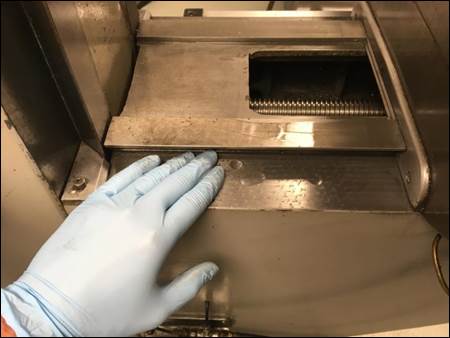
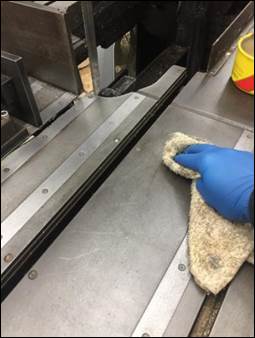
6. Use the used oily red shop rag to remove any old oil and debris (dust, chips) from the exposed ways on the X-, Y-, and Z-axes including the exposed X-axis lead screw.

Comparison of the Y-axis ways: uncleaned (left) and wiped down (right)
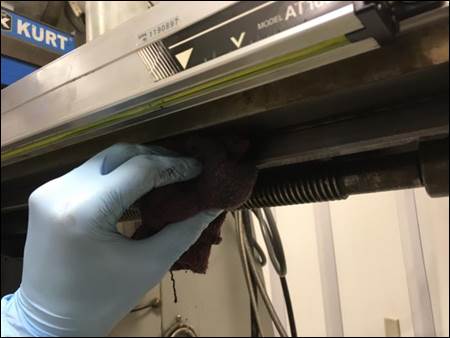
Wiping down the X-axis guideway
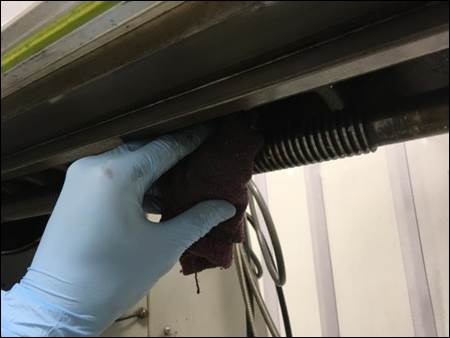
Cleaning the X-axis lead screw, making sure to wrap the rag around the circumference of the lead screw and wipe the length of the exposed portion
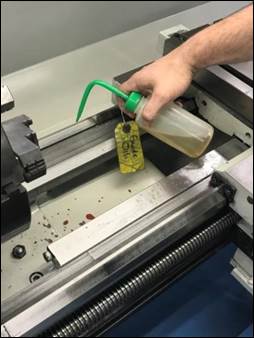
7. Apply small amounts of guide/way oil to one gloved hand and spread the oil evenly across all wiped rails and lead screws. Wipe away any excess that drips down the knee or column along the painted surfaces. Be sure to wipe the inner corners and overhanging surfaces of the dovetails in all rails.
Applying oil to the Y-axis rails, being sure to apply evenly everywhere including the dovetail feature
Oil being applied on the upper Z-axis rails, making sure to apply it on all faces of the dovetail
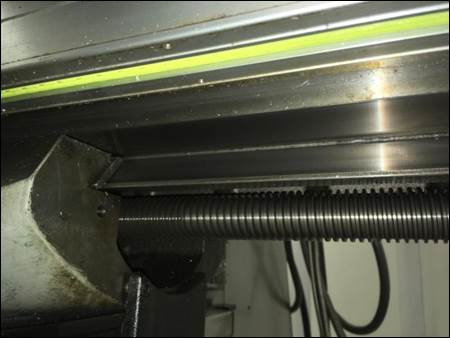
Image displaying the underside of the table with the X-axis rails on the front (with similar dovetail feature) and x-axis lead screw
8. Move the axes to an alternate position exposing the rails that have yet to be cleaned and oiled and repeat steps 7, 8.
9. Reposition the table with the center of the vise aligned with the spindle in the x and y axes, approximately 4”-5” away from the base of the spindle in the z axis.
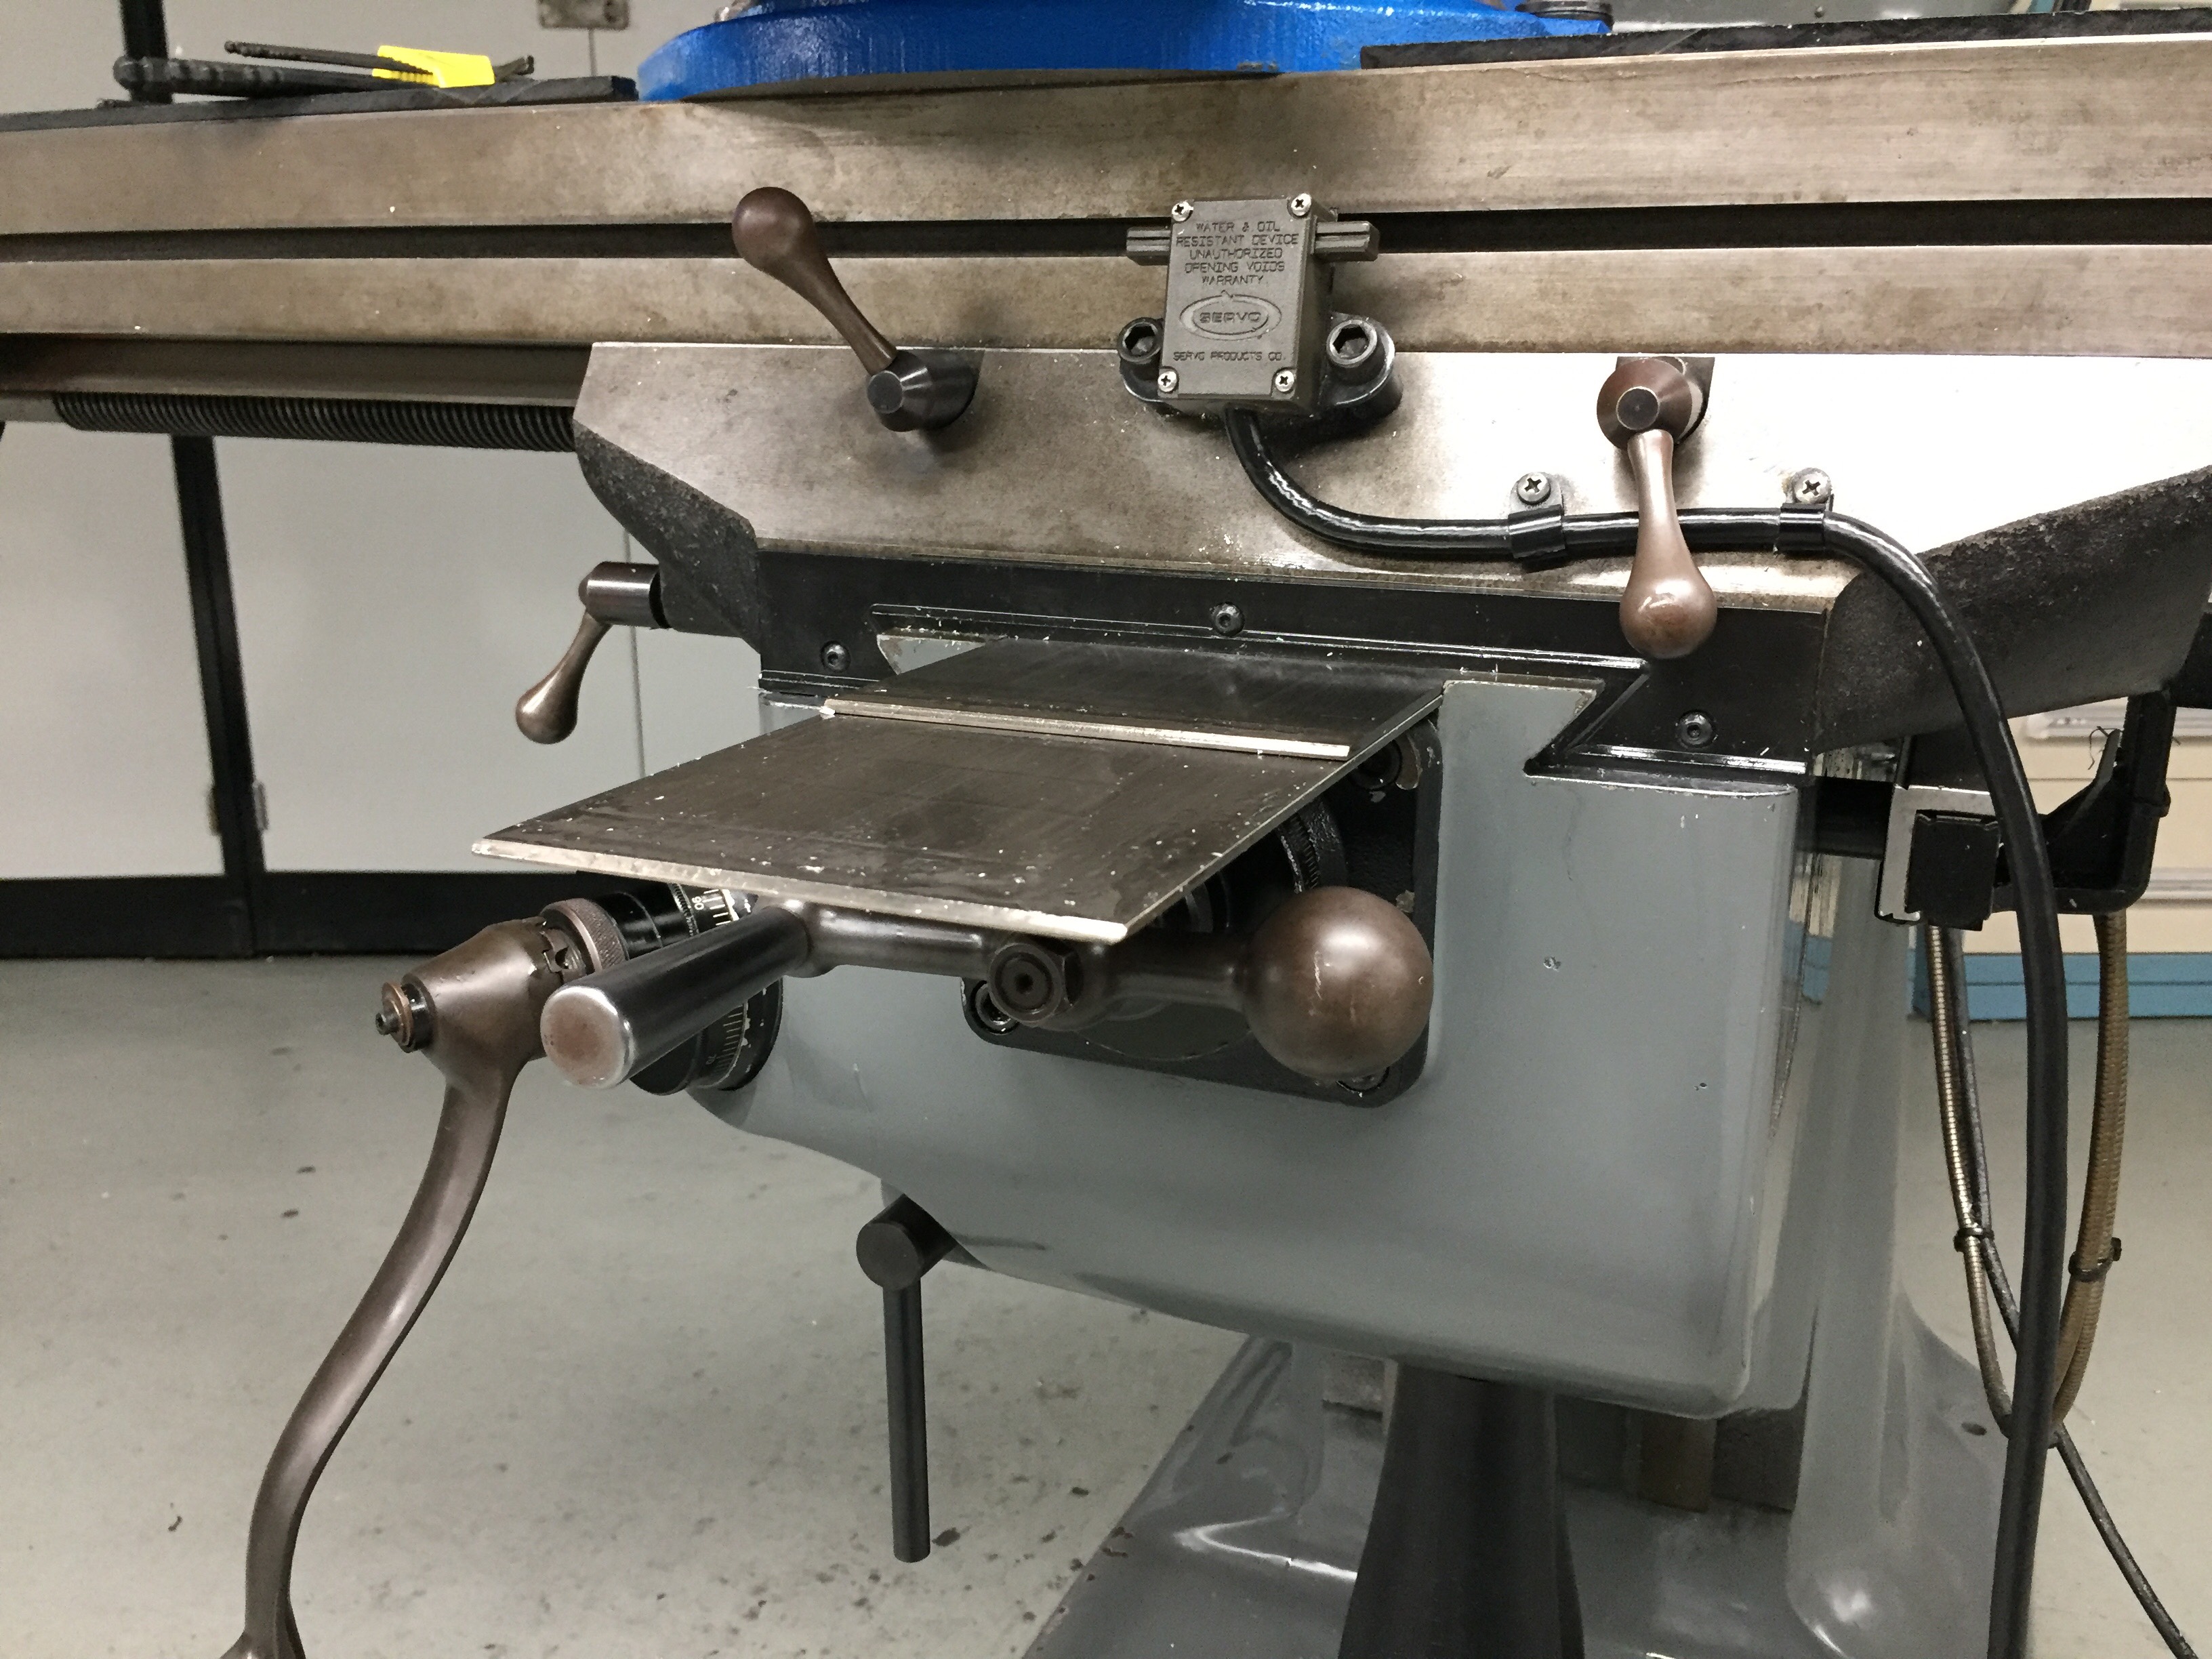
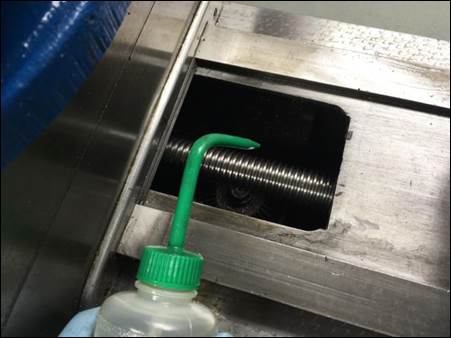
Oil Y- and Z-axis lead screws
1. Raise the table in the z-axis near its max travel with the spindle almost coincident with the top of the vise. This should expose a small amount of the z-axis lead screw below the knee for oiling.
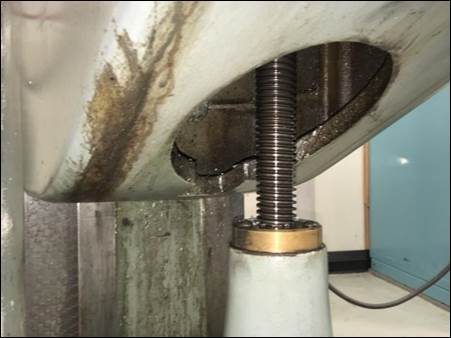
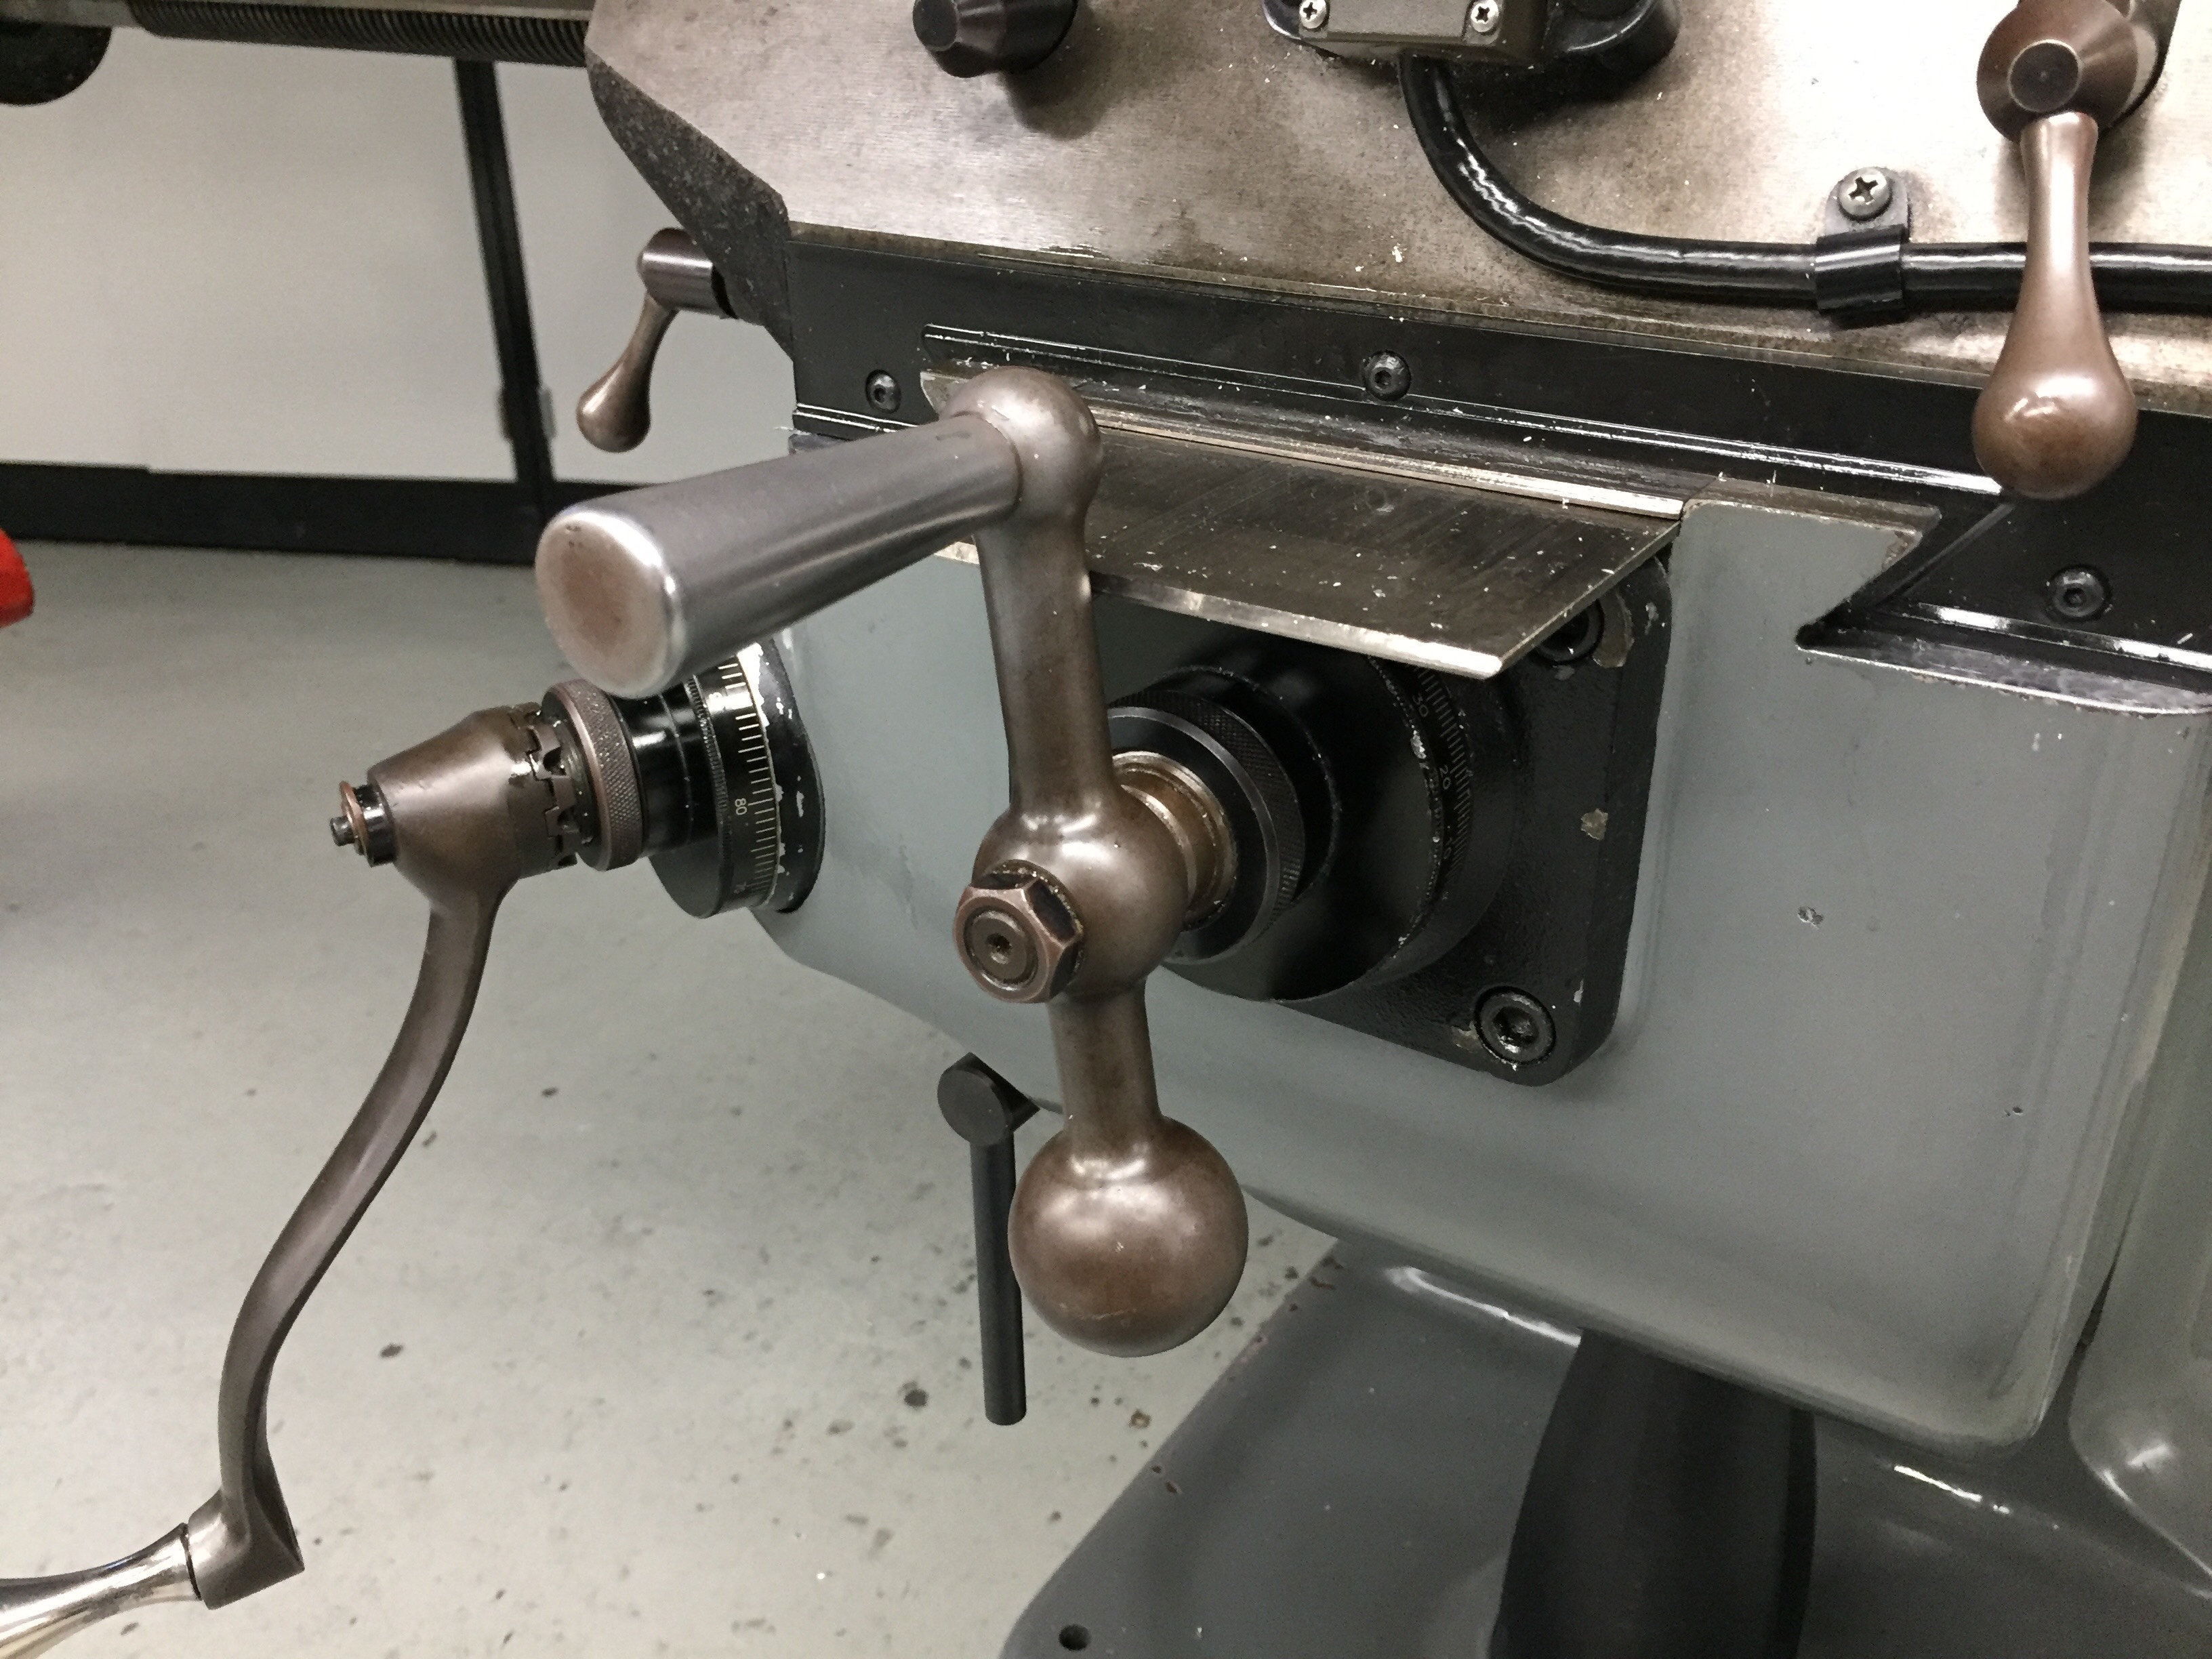
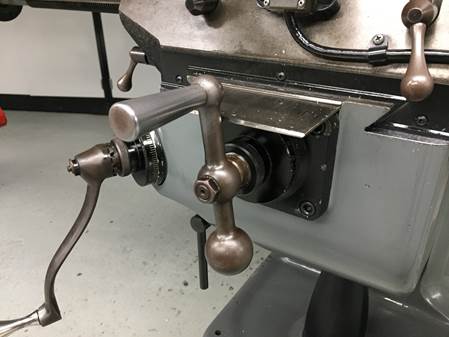
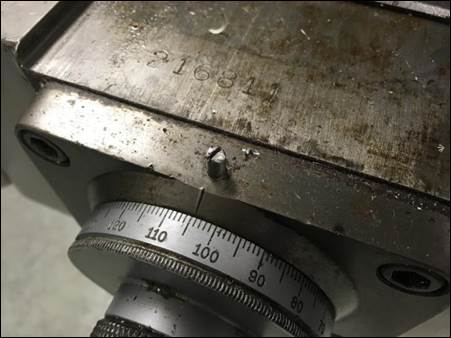
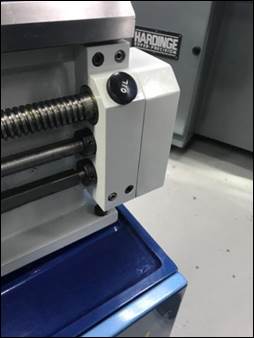
2. Remove the 10-32 screw at the front of the y-axis above the y-axis handle.
3.
Move
the saddle to the
front of the y-axis and position the handle in a horizontal
position.
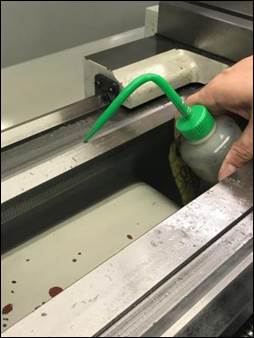
4. From the opposite end of the y-axis rails closest to the machine column, push the chip guard forward carefully sliding it out beyond the front of the machine exposing the y-axis lead screw, a bevel gear, and part of the z-axis lead screw.
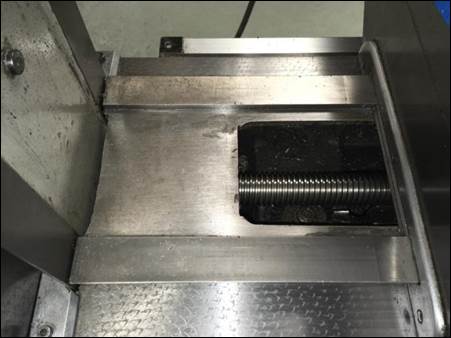
5. Using the air gun, blow inside the open knee cavity to remove any chips through the bottom opening of the knee casting.
6. Use an oily red shop rag to wipe off any chips and degraded oil off the exposed Y- and Z-axis lead screws inside and below the milling machine knee.
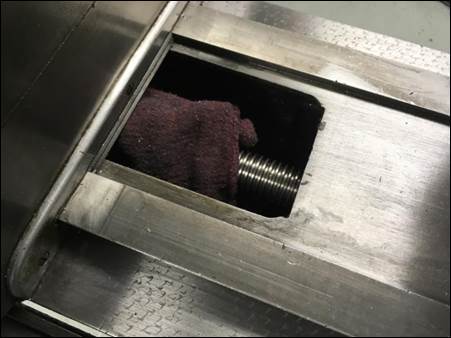
7. Apply oil to the lead screw or your glove with the way oil bottle and wipe around the entirety of the exposed Y-axis lead screw.
8. Apply oil to the Z-axis lead screw by applying oil directly to your glove and wrapping around its entire length and circumference.
9. Slide the chip guard back into place and replace the 10-32 fastener removed in step (2).
10. Return the table and knee to a central location on the milling machine.
11. Clean up any chips blown onto the base off the machine or floor, if the chips are excessively oily, some light mopping may be required following sweeping.
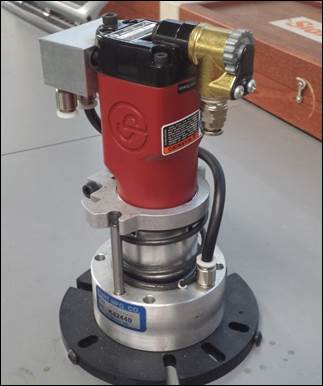
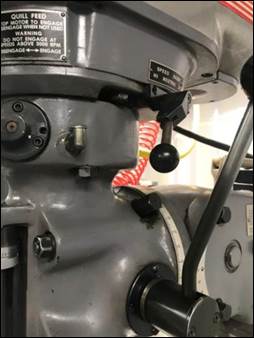
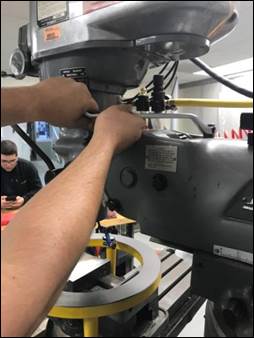
Lubricate pneumatic drawbar motors (1st week of semester only)
Sometimes the drawbar will make a loud rattling noise when the spindle is raised to the uppermost position while running. This noise is caused by a sticky pneumatic piston that engages the drawbar during tool changes. To prevent this from occurring, once a semester, remove the black metallic dust cover on top of the unit and apply a liberal amount of WD-40 lubricant to the outside of the piston so it once again moves easily without sticking. When applying the WD-40, cycle the piston manually by pressing it downward and releasing it several times.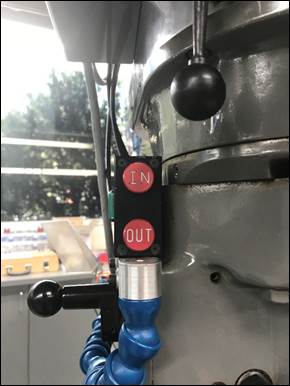
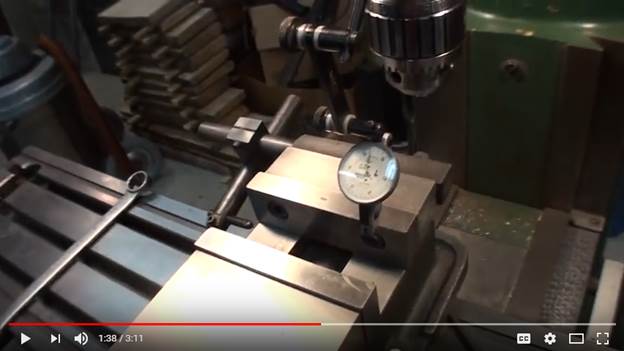
Tram (indicate and align) vises
Vise tramming is an essential skill and task for making good parts. Below is a good video showing how to do it in less than 60 seconds.
Clean & wax painted surfaces
Clean any dirty or oily areas with simple green before waxing. Use the Meguire’s liquid wax in the magenta bottle and a white rag that does not have a bunch of chips embedded in it. When you wax a painted surface, leave the wax on for at least 15 minutes and lightly wipe off to leave a thin topcoat on the paint.

Wax non-painted, non-oiled surfaces
Use the SC Johnson’s past wax in the yellow can and a white rag that does not have a bunch of chips embedded in it. When you wax a non-painted surface, just leave the wax on completely, don’t wipe it off to leave the most protection possible from corrosion.
Surfaces to wax include the vise top jaw bodies and the table tops.

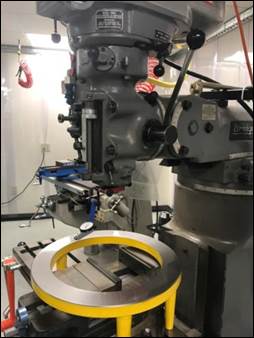
Tram (indicate and align) milling heads [estimated time: 30min]
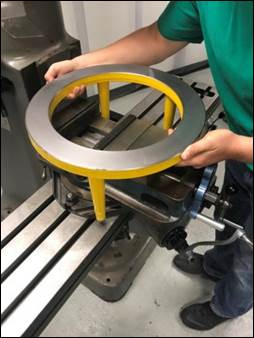
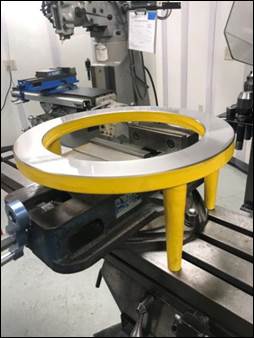
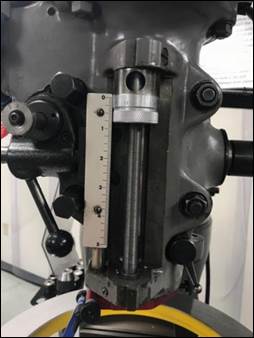
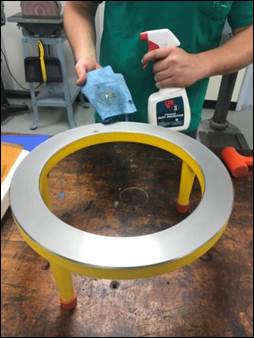
Tramming the milling head refers to the process of adjusting the axis of the spindle in the XZ and YZ planes such that it is normal to the XY plane of the machine. When doing this in the lab, you use two pieces of fragile and expensive equipment: a dial test indicator and a precision tramming ring. Below are the steps for tramming the milling head:
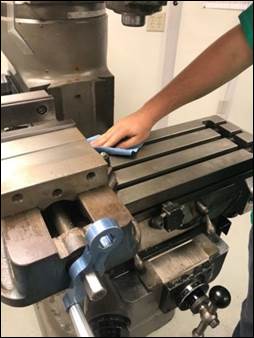
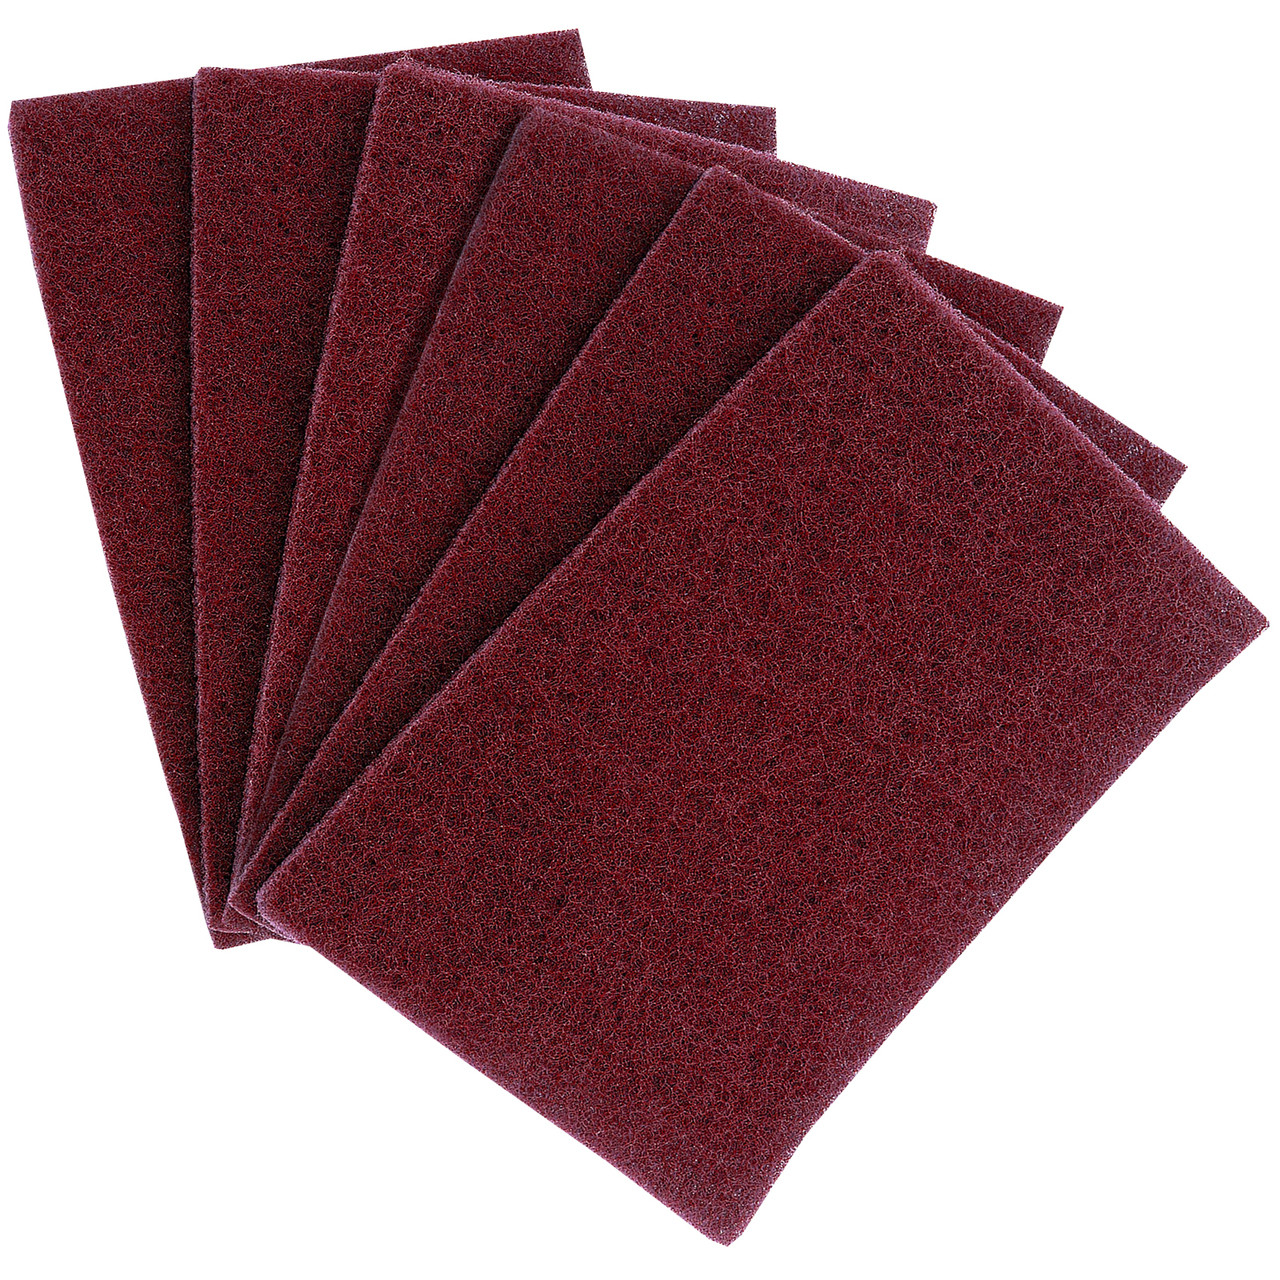
1. Remove the plastic mill table covers and wipe the wax and any chips off the table within 2” of the vise base using a clean blue shop towel. Remove any corrosion with a piece of Scotchbrite.
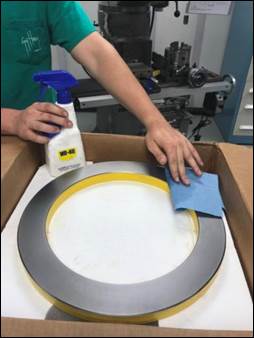
2. Remove the EZ Tram fixture from its box, being very careful not to drop it or touch the precision machined top surface or bottom feet. Wipe down ground surfaces with WD-40 and a blue paper towel, including the feet.
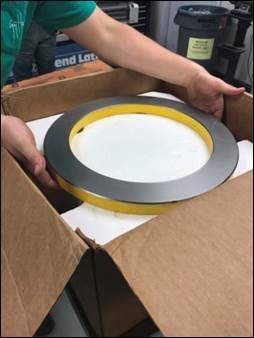
3. Place the EZ Tram over the vise, being extremely careful not to bump the vise, spindle, or table top with the bottom feet.
4. Clamp the indicator holder on the spindle nose and attach a dial test indicator on the other end, being careful to not drop anything onto the EZ Tram ring.
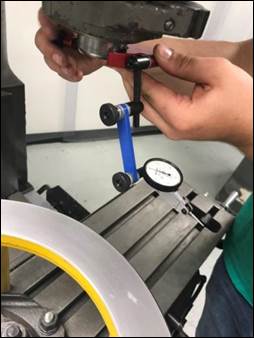
5. Place the spindle in neutral so it can be easily rotated by hand.
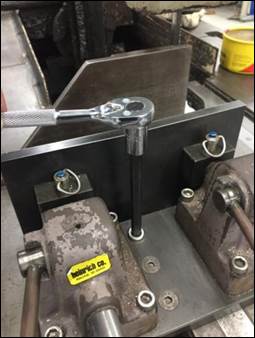
6. Adjust the indicator and holder so the stylus (and not the body of the indicator) gently touches the top surface of the tramming ring.
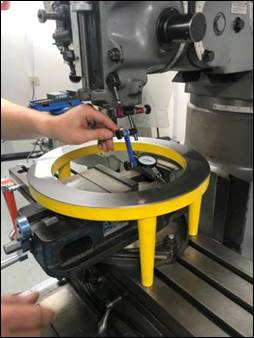

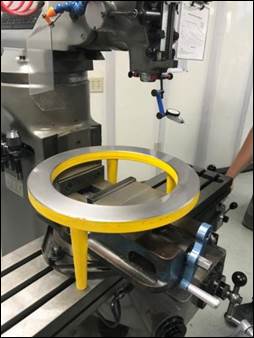
7. Rotate the indicator holder slowly to make sure the indicator stylus remains on the tramming ring the entire 360° rotation.
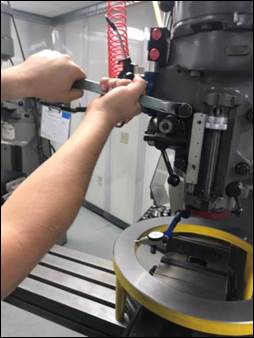
8. Check and if necessary adjust the mill head tram in the YZ plane first; it should be within 0.001” between the 12:00 and 6:00 positions. If adjustment is necessary, loosen the three clamping fasteners located around the pivot shaft (1st), being careful to keep both hands on the wrench at all times to protect the tram ring. Leave about 10 lb of force on each fastener so the head does not rotate under the force of gravity. With the indicator at the 3:00 or 9:00 position on the tram ring (2nd), slowing rotate the pinion shaft to tilt the head as necessary. When the tram is complete, re-tighten the clamping fasteners.
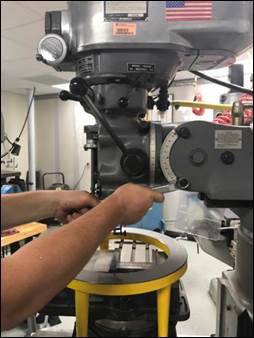
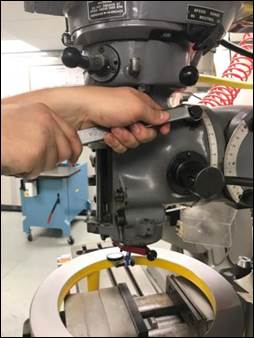
9. Check and if necessary adjust the mill head tram in the XZ plane second; it should be within 0.001” between the 9:00 and 3:00 positions. If adjustment is necessary, loosen the four clamping fasteners located around the pivot shaft (1st), being careful to keep both hands on the wrench at all times to protect the tram ring. Leave about 10 lb of force on each fastener so the head does not rotate downwards under the force of gravity. With the indicator at the 6:00 position on the tram ring (2nd), slowing rotate the pinion shaft to raise or lower the head as necessary. When the tram is complete, re-tighten the clamping fasteners.
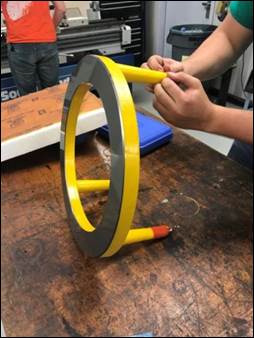
10. Return the tramming ring to the box and liberally coat the ground surfaces using LPS-3 and a blue paper towel.
11. Return the spindle in HI range for the next student or TA who uses it.
12. Re-wax the mill table around the area of the vise using the SC Johnson’s paste wax.
13. Reinstall the plastic table covers.
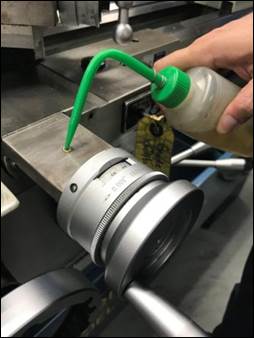
Oil ways and lead screws
1. Retrieve the way oil bottle marked with a green top from the yellow chemical safety cabinet.
2. Move the saddle all the way towards the tailstock and the cross-slide all the way towards the apron.
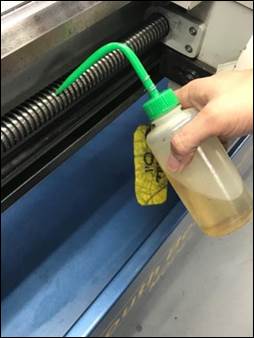
3. Wipe off any all oil and debris (dust, chips) from the exposed (guide)ways on the X- and Z-axes, as well as the Z-axis lead screw if they are dirty. Use a red shop rag from the red oily rag container for this purpose.
4. Apply oil through the small spring loaded ball oilers located on the carriage, cross-slide, and tailstock.

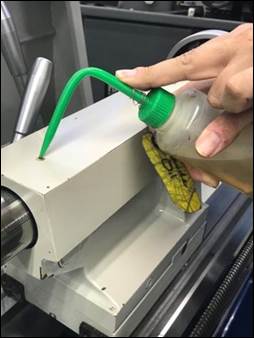
5. Apply small amounts of way oil to one gloved hand and spread the oil evenly across the two ways on the X-axis and the four ways on the Z-axis.
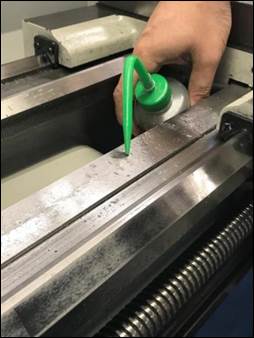
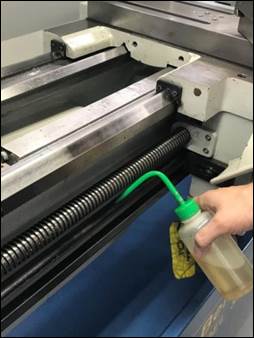
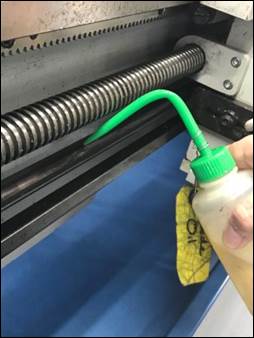
6. Apply oil to the Z-axis lead screw and feed screw using your glove and the way oil bottle.
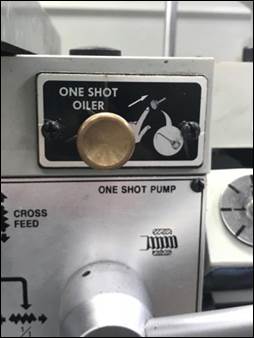
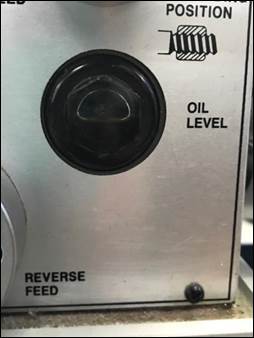
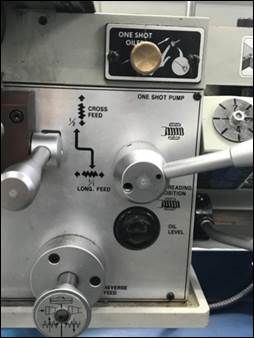
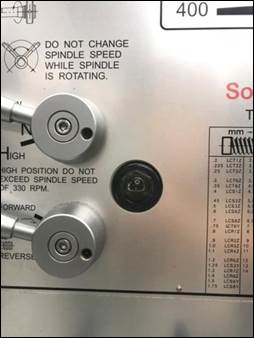
7. Check the oil levels on the sight glasses located on the machine headstock and apron. If the level is less the 1/3 of the sight glass refill using the black caps labeled oil.
8. Return the carriage and cross-slides to the centers of their travels.
Clean & wax painted and unpainted surfaces
Clean any dirty or oily areas with simple green before waxing. Use the Meguire’s liquid wax in the magenta bottle and a white rag that does not have a bunch of chips embedded in it to wax all painted surfaces. Leave the wax on for at least 15 minutes and lightly wipe off to leave a thin topcoat on the paint.
Clean any unpainted surface that is corroded with Scotchbrite before waxing. Use the SC Johnson’s past wax in the yellow can and a white rag to wax all unpainted surfaces. When you wax a non-painted surface, leave the wax on completely, don’t wipe it off to leave the most protection possible from corrosion. Surfaces to wax include the chuck bodies, compound rests (slides), cross slides, apron surfaces, and tailstock quill.

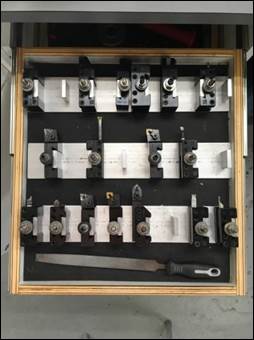
Inspect inserts / organize tools
Organize the tools in the lathe cabinets. Be careful not to open more than one drawer at a time, or you will tip the cabinet. Inspect the cutting tools and if unsure if one needs replacement, perform a test cut to decide. Small chips in the cutting tool inserts are typically not an issue because the students are learning to use the equipment and are pretty hard on the tools.
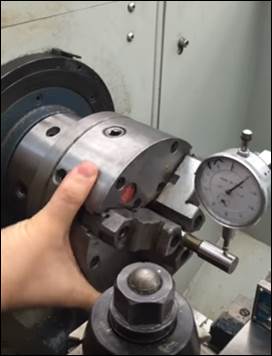
Tram chuck
Below is the shortest and most factually correct video I could find on how to tram (indicate and align) a set-tru style three jaw lathe chuck.
Grease chuck jaws
1. E-stop the lathe.
2. Place a small piece of plywood or a few sheets of cardboard under the chuck body with a few oily rags on top to catch the vise jaws.
3. Put on a pair of nitrile gloves found in the safety cabinet to protect your hands.
4. Open the vise until the jaws are released and fall from the chuck body.
5. Wipe any chips or other debris off the jaws. Leaving the old grease on the jaws won’t hurt anything.
6. Use a cue tip from the safety cabinet to clean chips or debris off the scroll inside the body of the vise by rotating the chuck pinion with the chuck key. Leaving the old grease on the scroll won’t hurt anything.
7. Use a cue tip to reapply grease to the scroll.
8. Note each jaw is stamped with a number (1, 2, 3) and corresponding numbers are stamped on the chuck body. It is vital the jaws are re-installed in their correct locations.
9. Rotate the chuck so jaw #1 is at the 12:00 position and install the jaw. Rotate the scroll backwards until the jaw falls down into position. Then rotate the scroll forward a few degrees to capture the jaw.
10. Rotate the chuck so jaw #2 is at the 12:00 position and install the jaw using the same technique explained in step 9.
11. Rotate the chuck so jaw #3 is at the 12:00 position and install the jaw using the same technique explained in step 9.
12. Wipe off any excess grease from the outside of the chuck body so it doesn’t get on anyone’s hands when they use the lathe.
13. Re-energize the E-stop circuit.
14. Lightly chuck the shank of a large endmill in the chuck and measure to runout to ensure the jaws were reinstalled properly.
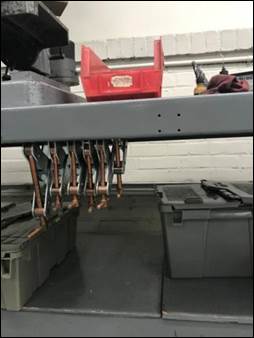
Drill Press [RETURN TO T.O.C.]
1. Organize clamps and work area. Place clamps securely on clamp rack under the table so they can't fall off; blow off work table; sweep the area; place dust pan and dust broom on hook under table.
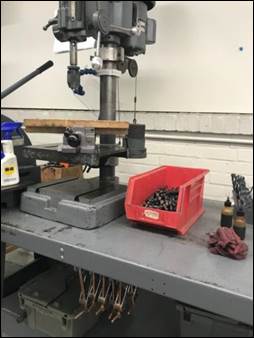
2. Wax machine table. Remove any surface rust with Scotchbrite; apply a thorough coat of SC Johnson's wax (yellow can) to top surface of table, don’t wipe it off to leave the most protection possible from corrosion.
3. Clean and oil vise. Remove any surface rust with Scotchbrite; clean with Simple Green; apply a light coat of oil to vise screw and guideways to ensure smooth operation.
4. Check chuck operates smoothly. Wipe the inside of the chuck out with a clean rag to remove any oil and ensure it opens and closes smoothly.
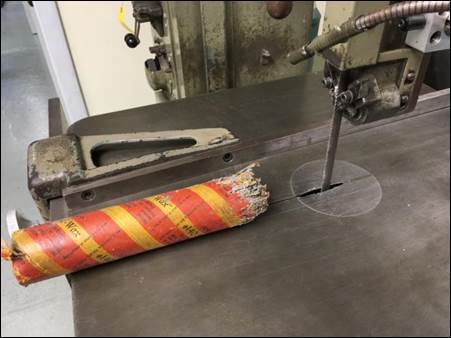
DoAll Bandsaw [RETURN TO T.O.C.]
1. Clean off table, empty metal chip pan on front bottom corner of machine, and sweep the area around the machine.
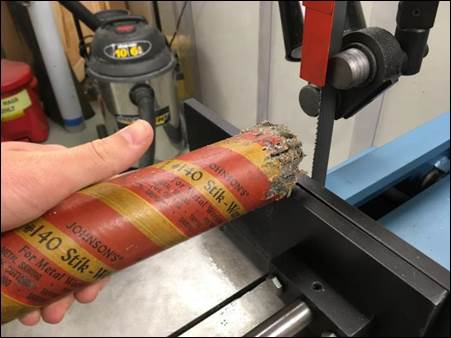
2. Check blade condition. Gently cut a piece of (approx.) 1/8" aluminum scrap to check for missing teeth or a twisted bandsaw blade; if damaged beyond acceptable use for typical lab sheetmetal cutting, inform Mike and replace blade.
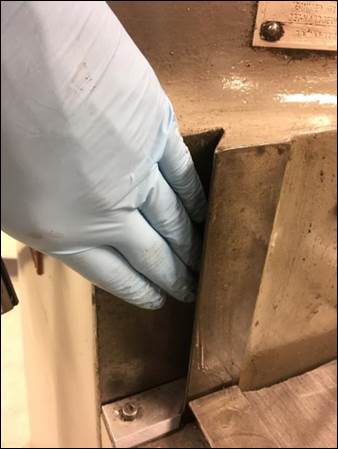
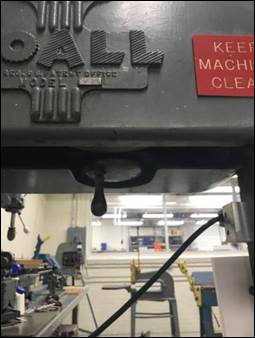
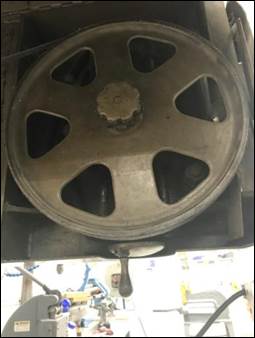
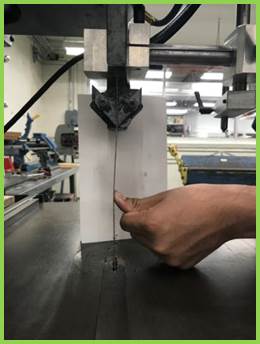
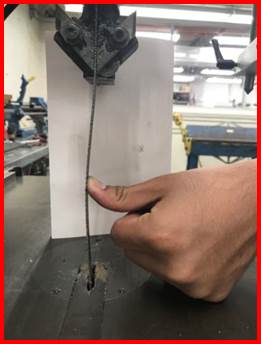
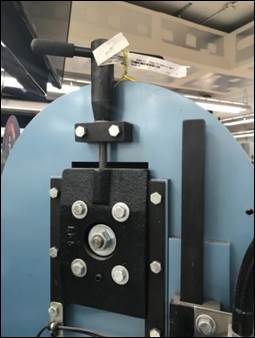
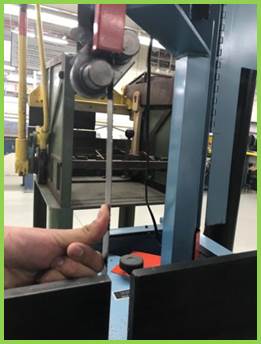
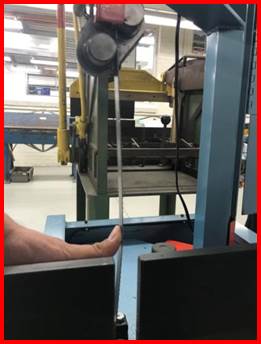
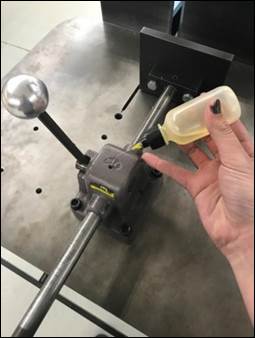
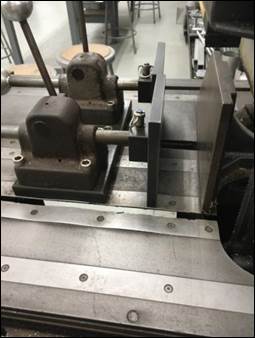
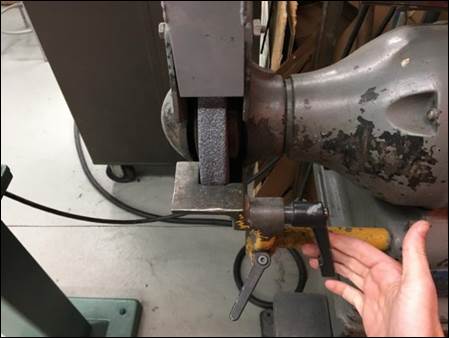
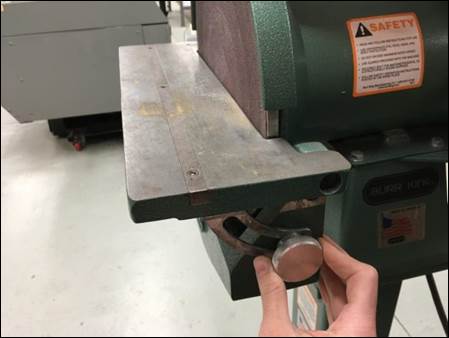
3. Check blade tension. Raise the blade guide approx. 6" off the table; applying 20 lb of lateral force should result in approx. 1/4" of blade deflection; the goal is to apply just enough tension to make the blade track straight and remain on the drive wheels. To adjust blade tension use the handle underneath the DoAll logo (1st & 2nd).
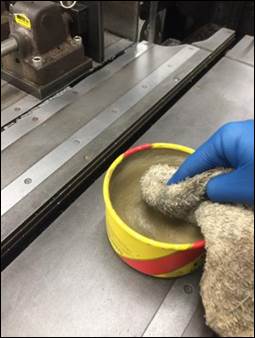
4. Wax blade. Apply a light coat of blade wax to all teeth on the blade.
5. Wax table. Remove any surface rust with Scotchbrite; apply a thorough coat of SC Johnson's wax (yellow can) to top surface of table, don’t wipe it off to leave the most protection possible from corrosion.
Roll-In Bandsaw[RETURN TO T.O.C.]
1. Clean off table, empty plastic chip pan on bottom of machine, and sweep the area around the machine.
2. Check blade condition. Gently cut ¼” off a piece of 80/10 to check for missing teeth or a twisted bandsaw blade; if damaged beyond acceptable use for typical lab cutting, inform Mike and replace blade.
3. Check blade tension. Raise the blade guide approx. 6" off the table; applying 20 lb of lateral force should result in approx. 1/4" of blade deflection; the goal is to apply just enough tension to make the blade track straight and remain on the drive wheels. To adjust the blade tension use the handle on the back/top of the blue housing.

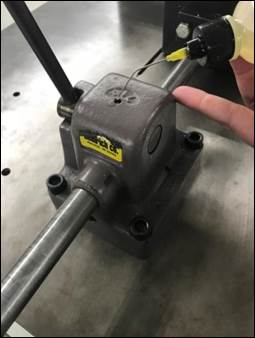
4. Check and lubricate vise. Ensure vise is operating smoothly over its entire travel; add oil in the lubrication hole.

5. Wax blade. Apply a light coat of blade wax to all teeth on the blade.
6. Wax table. Remove any surface rust with Scotchbrite; apply a thorough coat of SC Johnson's wax (yellow can) to top surface of table, don’t wipe it off to leave the most protection possible from corrosion.
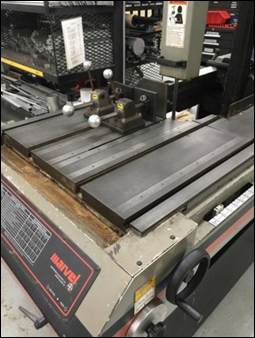
Marvel Bandsaw [RETURN TO T.O.C.]
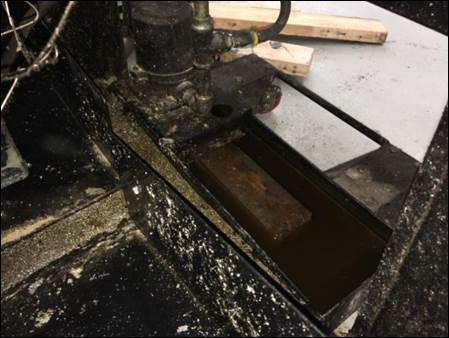
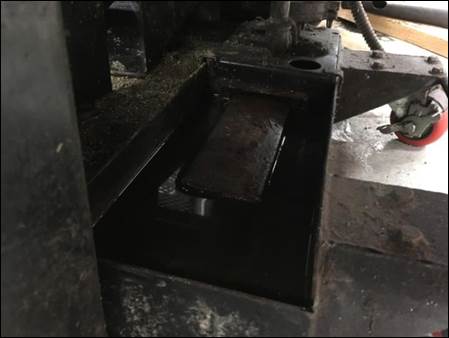
1. Dispose of chip swarf. Each week we should remove as much of the chip swarf from the top of the coolant tank as possible using a pair of nitrile gloves and a plastic dust pan.
2. Check/top off coolant level. Top off coolant by adding a 1/4" of concentrate (on the shelf by the rotisserie) and SLOWLY filling the coolant tank with water from the spigot so the level just covers the screen mesh on the right rear corner of the coolant sump; do NOT overfill. If you elect to use a bucket to top off the coolant tank with water, be very careful to not dump the water too quickly or it will overflow.
3. Check blade condition. Gently cut a piece of aluminum scrap to check for missing teeth or a twisted bandsaw blade; if damaged beyond accept use for typical lab cutting, inform Mike and replace blade.
4. Clean and wax table & vise. Use nitrile gloves; remove vise from table; remove surface rust with Scotchbrite or Evaporust chemical rust converter; clean out T-slots using the T-slot cleaner and wire brushes located in the tool storage bin on top of the saw; degrease table and apply a thorough coat of Johnson's hardwood wax (yellow can), let wax set for 15min and wipe off excess residue. When reinstalling vise, make sure it moves freely; if it doesn’t, you probably installed the vise t-nut backwards.
5. Lubricate vise. Ensure vise is operating smoothly over its entire travel; add oil in the lubrication hole. (Yes, the photos are of the identical vise on the Roll-In saw J.)

Sander / Grinder [RETURN TO T.O.C.]
1. Check grinding wheels. Touch wheel(s) with a piece of material to ensure all motion has ceased; clean grinder with compressed air and/or vacuum cleaner; rotate each wheel and inspect for cracks, chips or other anomalies and bring concerns to Mike's attention.
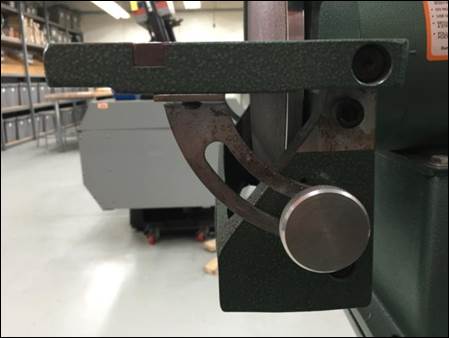
2. Adjust support pedestals. Use quick release handles to adjust grinding wheel support pedestals so they are within 1/16" of the grinding wheels; also adjust the upper wheel tongue guards to within 1/16" of the grinding wheels.
3. Check sanding disk. Clean sander with compressed air and/or vacuum cleaner; inspect disc for tears, delamination and excessive wear (i.e. the disc no longer deburrs, but just polishes a test piece, and bring concerns to Mike's attention.
4. Check sander table squareness. Use a carpenter's square to ensure the table is perpendicular to the sanding disc and adjust as necessary.

Sheetmetal [RETURN TO T.O.C.]
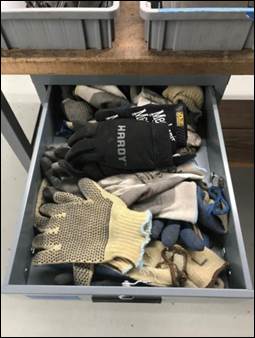
1. Discard all scraps. Wear sheetmetal gloves; clean scraps from all sheetmetal equipment into 5 gal bucket; dump bucket in welding shop dumpster.
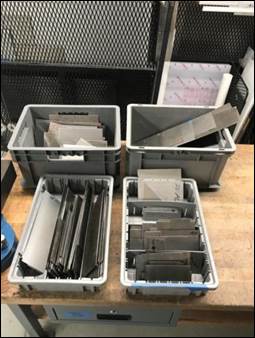
2. Organize sheetmetal/drops. Wear sheetmetal gloves; organize pieces larger than 12x12" on the sheetmetal rack by material type; place smaller pieces in the plastic drops bins according to material type; any drops smaller than 4x4" should be discarded in the welding shop dumpster.
3. Organize sheetmetal table. Discard gloves with holes or cuts; organize and clean table, leaving only the black deburring and layout rack on top of it.
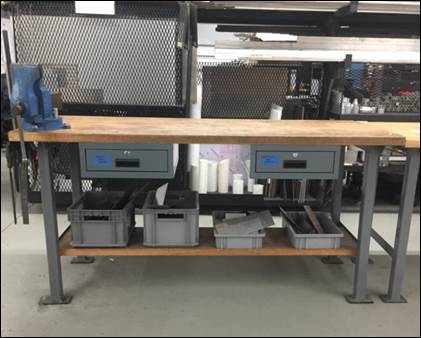
4. Organize steel workbench. Clean off workbench, leaving only a piece of MDF and a center punch and hammer for use marking target points for the punch press.

Material Rack [RETURN TO T.O.C.]
1. Organize aluminum bar stock. Wear sheetmetal gloves and organize aluminum bar stock by shape, size and length; be careful not to pinch your fingers while rearranging or moving the material around on the shelf.

2. Organize drops rack. Organize drops by shape and size; any pieces not large enough to safely make another wheel hub (i.e. < approx. 2.5") should be discarded into the aluminum-specific trashcan/bucket.

3. Organize 80-20 rack. Hopefully this is self-explanatory :).

Welding Shop [RETURN TO T.O.C.]
1. Clean off both welding tables. Discard scraps and place anything that doesn’t belong in a box or plastic bin.
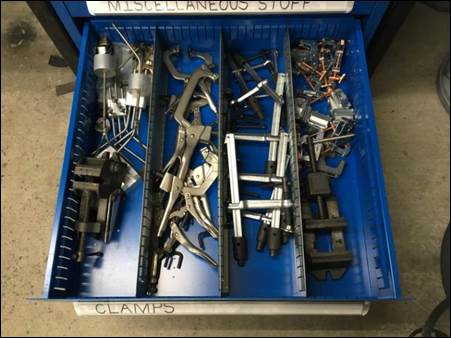
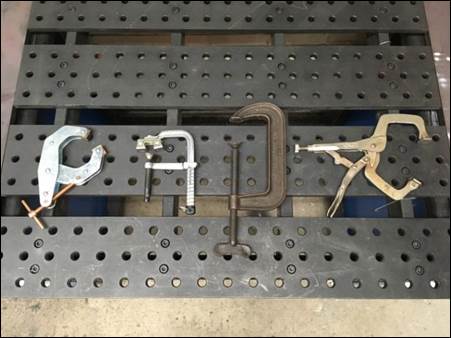
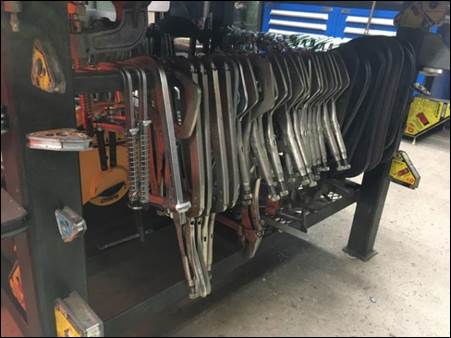
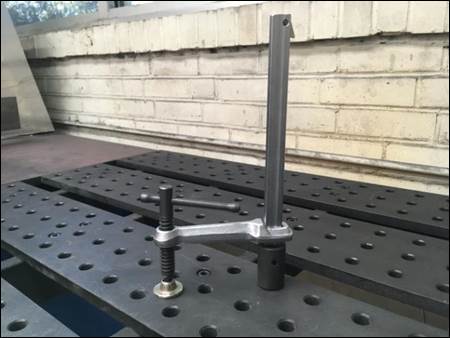
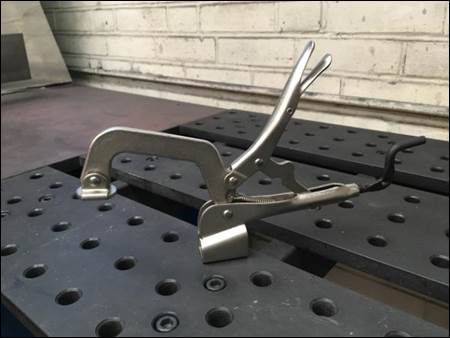
2. Organize clamps under welding table by type and size.
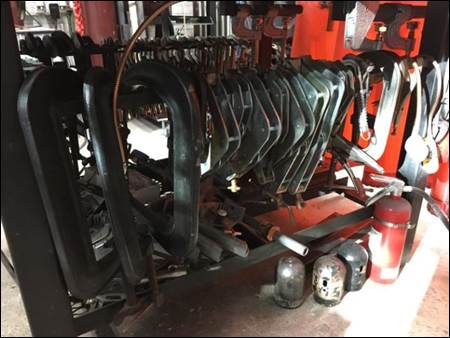

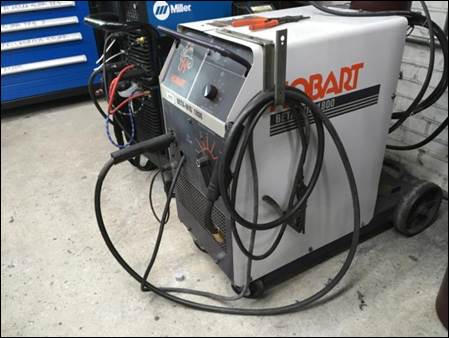
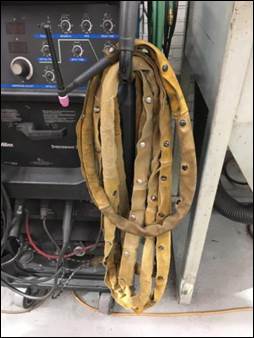
3. Wind cables properly on plasma cutter and all welders.
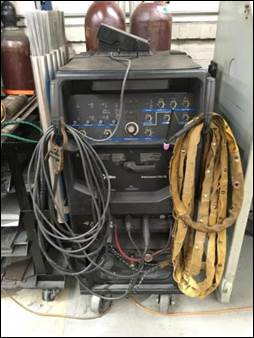
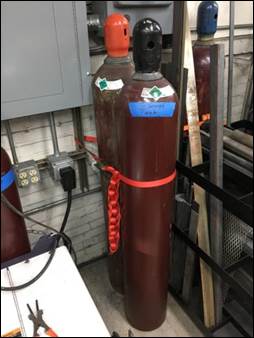
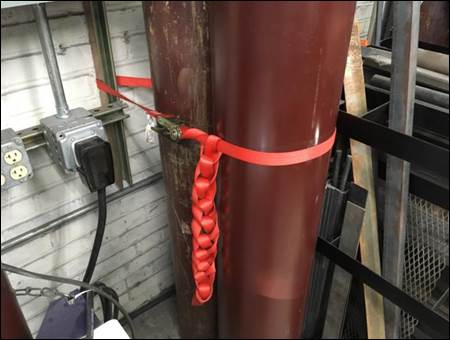
4. Make sure all welding gas bottles are stored properly. Free standing bottles must have steel caps and be anchored to something stationary for stability. Never anchor more than two bottles using the same strap.
5. Clean off welding mask lenses with the bottle of glass cleaner in the welding shop.
6. Blow off the tables and welders with air.
7. Sweep the floor.
TA Table [RETURN TO T.O.C.]
1. Organize the TA handout folders and return any not needed for the current week’s labs to the folder organizers on top of the lathe cabinets.
2. Discard unlabeled handouts. If it doesn’t have someone’s name on it, toss it in a recycling bin.
3. Use the lost and found bin. Place anything that’s clearly been left on the table in the lost and found bin by the refrigerator.
4. Locate TA safety glasses. Find the 6 pairs of TA safety glasses which belong on the hooks above the TA table.
5. When done the table should be clean and free of items which are not necessary for teaching that week’s labs.